Showing posts with label picture frames. Show all posts

3.21.2014

big boy room!

So after fixing up Micah's room a couple weeks back, I had to do something with Caleb's!  His poor walls were so bare!

I had a couple of Hobby Lobby gift cards so I decided to go there and look around.  All of their metal decor was 50% off!  I was able to get a few things there and add them to the other items I had:


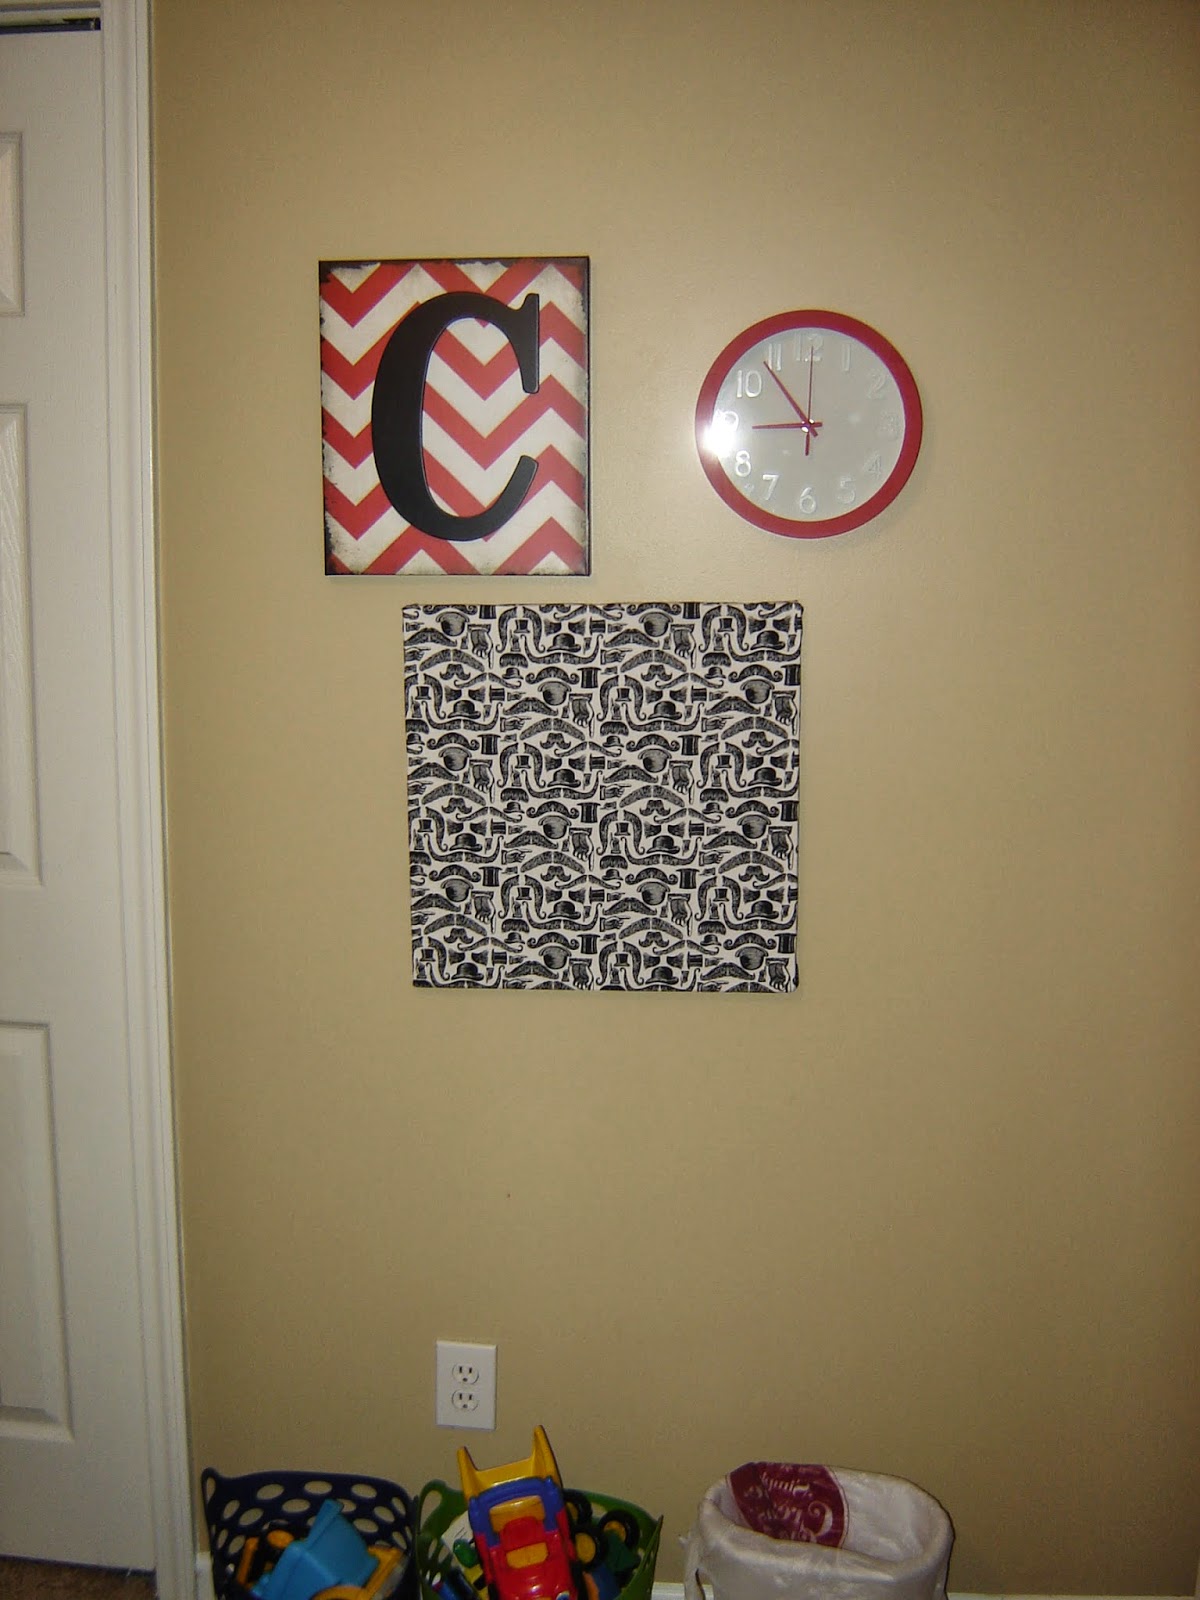
I was really excited to find the multi-colored chevron hanging...they had several of these at Hobby Lobby on clearance.  All they consisted of was heavy fabric stapled onto a wooden frame; I think they had used them as a display at one time.  Most of them were kind of ugly but this one just seemed to stand out and yell Caleb's name.  So I snagged it for $8.  The horseshoe, metal "C" hanging, and gasoline sign were also all from Hobby Lobby and 50% off.  I found the mustache/top hat fabric remnant at Walmart and used it to make a dresser cover and a wall hanging (I stapled it to a cheap canvas I found at Jo-Ann).  The mailbox is from Jo-Ann...Caleb loves getting mail so I figured it would be fun to leave little notes and surprises for him in there once in a while.  I got the clock from Target; he can't tell time yet but it will be good to have when he can.  And finally, I made the Cowboy and Engineer pictures from that Goodwill book I found a few weeks back.

I hung stuff up yesterday afternoon.  I thought Caleb would come running when he heard me hammering nails into the wall, but he was distracted by a movie he was watching, so in the end it was kind of fun to see him run in there and see everything at once!  He hadn't seen any of the stuff I found so it was all a big surprise!

Here's one wall....it's the one to your right when you first walk in, between his bedroom door and his closet:


Then there's the wall by his train table...you can see it straight ahead as you walk in:


And here's what's going on over his bed:


And finally, his dresser:


Hopefully that will help it from getting scratched...and dusty.  :o)

There's still a lot of blank space above his dresser, but we can figure that out at some point.  Whatever we put there, it'll have to be like his other stuff...cheap or free!

3.13.2014

Micah 6:8

Today I made one last thing for Micah's room.


It's a paraphrase of Micah 6:8; I came across it when I was pregnant and really wanted to eventually incorporate it into his room.  I used a frame I already had, as well as the wrapping paper from this project.  I had a lot of letter stickers left from the other hangings in the room too.  In the end it just came down to getting the handprint and footprint from Micah.  Which is easier said than done with a five-month-old.  He wanted to make a fist and curl his toes more than helping me out on this one.  :o)  So we did the best we could, and then I used one of Caleb's paintbrushes to fill in the muddled spots.  I actually used Caleb's paint too...it's non-toxic and washable, so I thought it was a pretty good option for something involving a baby. 

I'm about 90% happy with it.  Kinda wish I had used lighter-colored letters so they'd pop more against the navy blue cardstock, but since I wanted to use stuff I already had I'm okay with it for now.  We could always try again further down the road when Micah's a little older (and more cooperative with art projects!), but for now this complements the rest of the stuff in his room nicely.  Plus it adds another Scripture to his walls, so that's always a great thing in my book.  :o)

9.13.2013

baby on a budget: nursery wall art

This afternoon I sat down to make some wall art for Micah's room.  A few weeks ago, I found some cute blue chevron scrapbook paper at Hobby Lobby, as well as some thick letter stickers.  I am hopeless at freehanding this kind of thing, and the stickers seemed like a good idea.  Especially since they were on sale at the time.  I used some of Caleb's construction paper for the moon and stars since I didn't have any other scrapbook paper without some kind of pattern, and I figured that would be too busy with the chevron pattern being the background for the whole thing.


I kept coming back to the phrase "I love you to the moon and back" from the book Guess How Much I Love You.  The story really has nothing to do with space, just a father and son rabbit trying to out-love each other!  :o)


I decided to paraphrase a verse from Philippians as well.  I like the idea of having Scripture on the nursery walls; I did the same with Caleb's room back when he was a baby and it really helped me know how to pray for him (especially during late-night feedings when the last thing I felt like doing was praying).  :o)

All in all these two pictures took me about half an hour total.  The letter stickers were really forgiving too; they were easy to reposition if needed without ripping up the paper too much.  I know we have some 12x12" frames somewhere packed away.  I was planning on trying to find a couple that used to hang in Caleb's old room and repurpose them for Micah's room since the Scripture hangings I made for Caleb are a little babyish for his room now.  Of course since we haven't unpacked any boxes with pictures in them it's been hard trying to find them, especially since a lot of those boxes are heavy and there's no way I can move them around without hurting myself.  Might have to enlist the hubby's help with that at some point.  :o)

I also went ahead and utilized some cute vintage space flash cards I found on Etsy a few months back.


They were very reasonably priced and I had just decided on a space theme when I came across them so I knew I could incorporate them somehow.  I used some blue baker's twine and metal clips I already had to hang them above the changing table.  I went ahead and used a couple of clear push pins for this; I figured a couple of little holes in the wall wouldn't be a huge deal, plus this kind of thing is much easier to hang than an actual picture so I knew I could get it right the first time!


They seem higher above the table in the picture than in real life for some reason.  I hung them at eye-level, that way the baby can't grab them when we change him.  :o)

7.16.2012

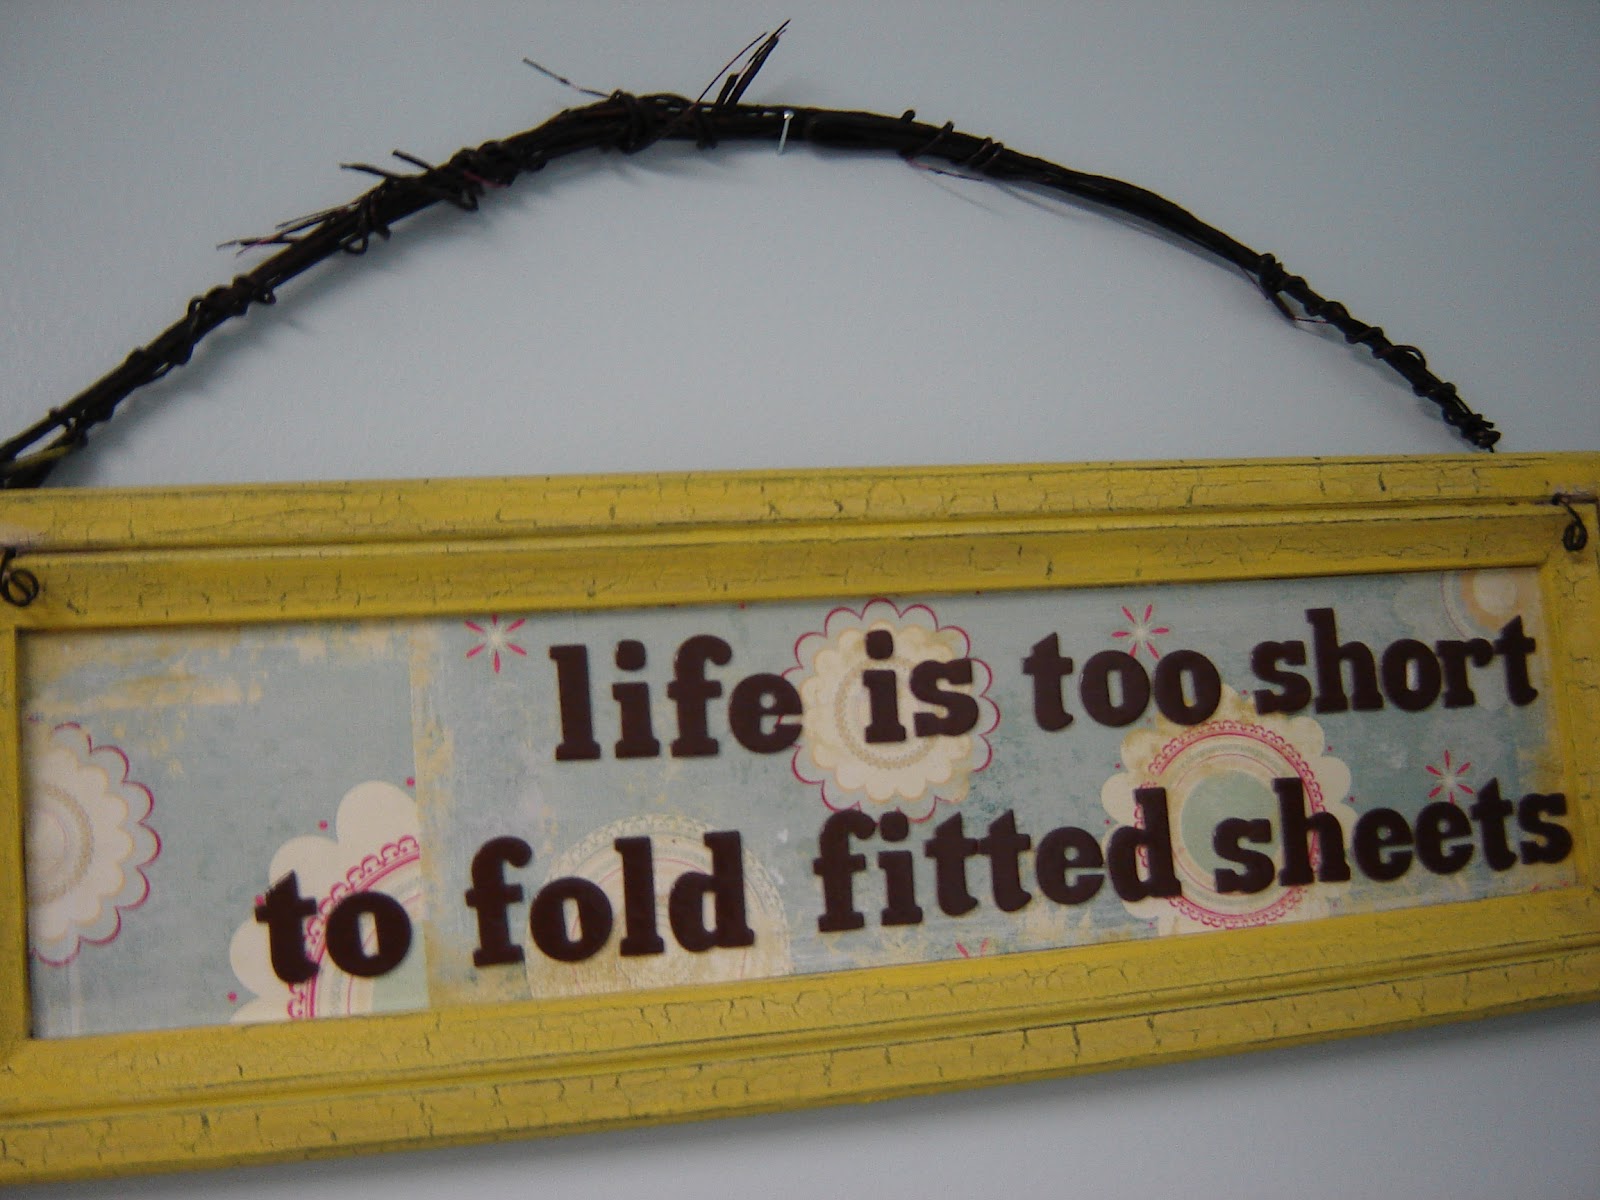
upcycled laundry sign


Over the weekend I finally finished a project that I've had in mind for awhile.  It started with this $3.00 sign I found at TJ Maxx last year:


I liked the crackled look of it and its cheap price tag, but that's about it.  I decided to upcycle it for my laundry room by doing something similar to this sign that I saw on Pinterest once.  I painted it with yellow acrylic paint, then Mod Podged some scrapbook paper on top of that.  After that I used some chipboard letter stickers I found on clearance at Hobby Lobby to spell out one of the truest statements that will ever be uttered in a laundry room.


And I truly believe it.  I am 30 years old and I have a Masters degree, and I still cannot for the life of me fold one of those things.  I've even watched instructional videos on YouTube and I still can't grasp it.  I do a decent job with my son's crib sheets, but our queen-sized ones are almost impossible.  I kind of just wing it and hope for the best.  But I digress.

I like the quirky look of my sign, and it doesn't bother me too much that some of the letters are a little lopsided.  It's got character, and that's all I ask for.  It really pulls this corner of my laundry room together.


Total cost:  Around $4 for the letter stickers.  I had to get two packs to ensure I'd have enough letters to complete the project.  Every thing else I had on hand.  Yay!

So now I think the only other thing I really want for this room is a new ironing board cover.  Haven't found anything I like yet.  I might make one but I'm not sure I want to so we'll see!

Linked up to Creations by Kara!

2.04.2012

burlap earrings holder


I think I'm in love with this project.  Especially because it was essentially FREE.  I got the inspiration from a blog called Positively Splendid.  :o)

I started with a pretty framed mirror I found at Hobby Lobby over a year ago.  It hung above my dresser for awhile, but once we repainted that room I wanted something different.  I loved the look of the frame, but didn't really need the mirror part.  So I decided to make an earring holder out of it instead.


I removed the mirror and the backing (which involved loosening some very tiny screws, by the way), and then found some scrap burlap leftover from that Christmas tree skirt I made.  Taking the advice from the original tutorial, I cut the burlap a little bigger than the frame's opening and then ironed it with spray starch till it was nice and stiff.


Then I used my staple gun to carefully attach the burlap to the back of the frame, pulling tight as I went.  I was thankful that it had a wooden backing despite being a metal frame; otherwise I probably would have had to use hot glue instead.


Once I had it down nice and tight, I trimmed off the excess and that was that.


I decided not to add anything else since the frame's on the small side and is already pretty embellished on its own.  And since it coordinates wonderfully with other items in our master bedroom, I think I'll return it to the spot above my dresser; it'll hang right next to my other jewelry organizer so it makes sense.

The burlap is nice and stiff for holding earrings, and it's the perfect size for me since I don't wear that many dangly ones.  I do have a few more than just the two pictured, but that's about it.  Maybe now that they'll be hanging right in front of my face when I get ready in the morning, I'll be more likely to wear them.  :o)


Total cost:  Zero dollars. :o)

So what do you think??


Linked up to Creations by Kara and A Little Tipsy!

1.26.2012

dry-erase love-note message board


I saw this idea online recently and loved it.  I think it's technically supposed to be for your kids, but I don't see why it can't work for husbands and wives as well! 

My husband and I often leave handwritten messages on our bathroom mirror with a dry-erase marker.  I thought it would be a cool idea to have a dry-erase message board in there, complete with a prompt.  Kind of like romantic Mad Libs.

I took this frame off the wall and got rid of my attempt at scrapbook paper abstract art from a few years ago.  I also got rid of the white matte.


Then I just pieced some coordinating scrapbook papers together and used a blue-green sharpie to freehand the letters.  And you can probably tell I freehanded all the letters.  Oh well, that just makes it more special.


Our bathroom gets GREAT lighting, can you tell??
So now all we have to do is write on the glass with a dry erase marker.


And just think of all the ways we can finish this sentence, from encouraging words ("I love you because you work so hard for us") to jokes ("I love you because you remembered to put the toilet seat down")!  It also compels both of us to really think about WHY we love each other.


And if I ever get sick of the paper I used (or if it clashes with whatever paint color we choose for the walls once we spruce that bathroom up), it won't take me long at all to change the look.

Project cost:  Zero dollars and twenty minutes.  Hopefully it looks like it took an hour at least.  :o)

12.06.2011

christmas crafts: repurposed door hangings

So I wanted something Christmasy to hang on our front door...so I took the simple wreath that was hanging there all fall, added a 50-cent bow from Michaels to it, and hung up a tree ornament inside of it.


Not too shabby.  You can't see it very well from the road, but I'm sure it looks cheerful to anyone who comes up to our door!  I might do something more elaborate if I come across something else, but this will do for now.

Most of the time we use the door off of our garage, so I wanted something there too.  Last year I made this Christmas card holder out of a picture frame, but now that my kid is walking around and can reach it with no problem I knew that it wouldn't work anymore (not to mention being in a box all year made that upholstery strip really wrinkled!).

So I cut the strip off and hung it on the door.


So I spent around $2.50 for one door, and nothing for the other door.  That works for me.

9.14.2011

perpetual calendar


You may remember me saying that I have a hard time resisting fabric when it's on clearance.  Well, before I got back into sewing, I was even worse about scrapbook paper on clearance.  Hobby Lobby certainly didn't help things; they used to put a huge rack of single sheets in the clearance section and price them ten for a dollar.  Enable much??

Anyway, I had this cool double frame I got at Target a few years ago.  And it was clearance-priced.  But you already guessed that.  Sigh.


And it was a really cool frame.  The individual frames flipped around so you could put another photo on the back.  But I got bored with it.  So when I saw this perpetual calendar idea on {Pressed Down, Shaken Together}, I decided to give it a go and maybe put a dent in my scrapbook paper stash while I was at it.

First, I popped the smaller frames out of the big frame.  This of course left holes in the larger frame, but they weren't that noticeable.  Maybe if I had had some kind of filler or wood putty on hand, I would have done something about it, but I honestly didn't mind.  I figured once I was done, those holes would be hidden or at least not glaringly obvious (spoiler alert...I was right!).

I decided that since I was using a rectangular frame, I would make two sets of cards; one for the days of the week, and one for the actual number dates.  And since my frame was pretty thick, I didn't worry about making the cards double-sided like in the original tutorial since I knew there would be enough room.  The author of the tutorial also had the great idea to use snapshots and cool embellishments to make the calendar really meaningful and personal, but in order to keep this project as cheap as possible, I decided to rely on the pretty, eye-catching patterns of my paper instead.

So last Friday night I got to work.  What Women Want was on TV, and by the time the movie was over, I had this to show for my night:


Really I just found a cute font in Word that I liked, increased the size to about 300, and then printed out the outlines of the numbers 0 to 9.  I cut them out and used them as stencils for each card.  This is the creativity you have to resort to when you don't have a fancy cutting machine.  But I digress.

Then yesterday I did the days of the week set.


There you go.  Not one card is the same paper.  Really.  I checked!  Anyway, I already had some neutral colored cardstock from another project so I just cut squares that were a little bigger than the scrapbook paper squares.  That way the cards wouldn't be as flimsy and would flip better.  I mounted the scrapbook paper squares onto the cardstock squares with scrapbook adhesive squares (best stuff EVER), punched two holes in all of them, and then got ready to put everything on the frame.

The original tutorial uses twine to loop everything together, but I decided to try cable ties first.  I found some in black to match my frame, and made sure they were long enough to go through everything.  I probably would have used twine or something else if I hadn't kept my frame black, since it's hard to make cable ties look attractive unless they match your frame!  I tried to make everything as even as possible, so if it's a little crooked hopefully it's not that noticeable!


Not too bad, huh?  I did have a panicky moment when the cards got hung up on the end of the cable tie when I tried to flip them, but after I worked the whole loop around a little, everything laid flat (kind of like when your paper gets hung up in a spiral notebook but once you mess with the spiral a little it's fine....or maybe that just happens to me).  So now I have a calendar that works for any month of the year.


Ta-da!  I like how it looks on top of our desk.


And each new day, you just flip to the next card!  Here's another outside shot, since my house and camera both make for insanely dark photos.


And the grand total for this project is.....88 cents for the cable ties.  And it was a pack of 20 so I have most of them left for...oh I don't know, maybe actually tying cords and cables together as nature intended?  I had the frame, paper, markers, and scrapbook adhesive squares on hand already so there was nothing else out of pocket.  LOVE IT.

Linked up to Creations by Kara and A Little Tipsy!

8.23.2011

cheap framed monogram


Okay, I know it's been a few weeks since my last post.  Life does seem to get in the way sometimes, but hopefully this will make up for my absence!

For over a year, Hobby Lobby had some pretty metal letters hanging up that I loved, but the price tag wasn't as good.  Even with a 40% off coupon, they seemed overpriced to me.  Sometime this year these letters were moved to clearance, but I never really noticed an "I" being among them since there was SO much other stuff in those aisles.

Then a few weeks ago, I spotted one of these letters.  And it just happens to be the first letter of our last name.


What?!  This was in clearance the whole time and I never saw it?  I was happy to see it wasn't too scratched up from being moved around so much.  The best part was the price though.


Yep.  $1.20.  And since that was like the sixth or seventh clearance sticker on there, it seems that it was a good thing that I didn't see it before now.  The original clearance sticker said this:


I think we're looking at $8.50 here.  As the original "clearance" price.  Craziness.  Under two bucks is much more my speed, and it was just so gratifying to hand the clerk two dollars rather than swiping the debit card!

Anyway, I thought the letter looked a little plain on its own, but I didn't want to spray-paint it or anything since I really liked the look of the metal.  So I pulled a large frame out my stash and spray-painted that instead.  I figured hanging the frame around the initial would make it pop a little.  I'm so glad I had this "Lagoon" color leftover from my keyholder.  LOVE IT.


So the total for this project: $1.20 plus tax, since I already had the spray paint and the frame was free from my mom.  Not too shabby.

I'm thinking I'll hang it in my mudroom since that lagoon color matches other stuff in there.  There's still a big blank wall to the right as you walk in, so I might try to do a frame collage there, with this monogram being in the center.  I'm certainly not at a loss for frames right now, it's just a matter of spray-painting them to match and figuring out a layout!  Stay tuned.  :o)

Linking up with Creations by Kara and A Little Tipsy!
6.07.2011

"gone postal" picture frame


And yet another addition to my mudroom....using stamps from the same collection I used for the mail holder.  I actually started this project months ago, but never finished it.  The stamps were already Mod Podge'd onto the matte, so the other day I just spray-painted and distressed the frame a little more; I don't have a before picture, but the frame was a dark brown and just kinda boring.  :o)

As you can see, I don't have anything in the frame yet, but I liked how it looked so much I went ahead and hung it up next to my mail holder.  I like all the contrasting colors and pictures on the stamps and how they all stand out against the color of the frame.


I also added a simple plaque I found on clearance at Michael's for less than two bucks.  The hangers on the back were lopsided (perhaps the reason why it was on clearance!), so I used more twine to hang it up instead.


See now I just need to find something to put in there and then we'll really be in business.  :o)

Linking up to Creations by Kara!

6.04.2011

thrifty finds: hanging flower frames


We have a small "mudroom" right off of our garage that needed some brightening up (as well as something to take one's attention off the fact that the walls in there badly need a fresh coat of paint!).  I found this idea over at a blog called Flamingo Toes and thought it was the cutest thing.

My mom just gave me a huge stash of old frames, so I dug out a few I liked.


Then I spray-painted them yellow to make them nice and cheerful-looking.


My original plan was to distress the frames once they had a couple of coats of paint on them (kind of like what the author of the blog did), but since I didn't use primer on these frames before I painted them, I ended up getting the distressed look I wanted with just one coat of the yellow.  Which meant less time on the back porch exposing myself to spray-paint fumes.  Awesome.

Then I grabbed some twine we had in the house and followed the directions on the blog in order to tie the vases to the frames.  I hung the frames on the wall (they're just resting on the nails), and then stuck some flowers in!


The author used fresh flowers, but I went with silk so I wouldn't have to worry about cleaning out the vases when they got gross.  The vases were all from Hobby Lobby's clearance section, so they were about a dollar each.  And the flowers were 50% off at Hobby Lobby this week so I snagged those too...they came in a bunch so I have most of them leftover for another project.

So now our mudroom is just a bit more cheerful.  This flower display will be the first thing I see whenever I walk in from the garage, so that makes me happy.  :o)
Related Posts Plugin for WordPress, Blogger...