So I have a monster cold right now. And so does my son. Yuck. Don't really feel like sewing anything right now.
Until I get over this cold and feel inspired to be crafty again, let me share a super-yummy soup recipe with you. I made this last week for dinner, and my husband and I both loved it (not so much our son...he still gets picky with potatoes sometimes).
I modified the recipe a little, since I think it needed more cheese (come on, don't most recipes need more cheese?). Plus the recipe called for sauteing onions for the base of the soup, but my hubby isn't crazy about chunks of onions in his soup, so next time I'm just going to use a little onion powder instead. You can find the original recipe here, but I'll go ahead and give you my somewhat adapted version below.
Loaded Potato Soup
(adapted from Cooking Light)
4 (6 ounce) red-skinned potatoes
1/2 to 1 teaspoon onion powder (to taste)
1 1/4 cups fat-free, lower-sodium chicken broth
3 tablespoons all-purpose flour
2 cups 1% low-fat milk, divided
1/4 cup reduced-fat sour cream
1/2 teaspoon salt
1/4 teaspoon pepper
3 turkey bacon slices
1 cup shredded cheddar cheese, divided
Thinly sliced green onions (optional)
1. Pierce potatoes with a fork and microwave on HIGH 10-12 minutes or until tender. Allow to cool slightly and cut in half.
2. While potatoes cook, heat the chicken broth in a saucepan over medium-high heat. In a separate bowl, combine the flour and 1/2 cup of the milk. Add this and the onion powder to the broth, as well as the remaining 1 1/2 cups of milk. Bring to a boil, stirring often, and cook for one minute.
3. Cook bacon in the microwave for 3-4 minutes while doing step 2. Allow to cool and then crumble it.
4. Remove the soup from the heat, then add the sour cream, salt, and pepper. Remove the potato flesh from the skins. Coarsely mash the potatoes into the soup. Stir in 1/2 - 3/4 cup of the cheese (personal preference), and then top with remaining cheese, bacon, and onions.
Mmmm...enjoy!

3.30.2011
"twenty-five things" subway art
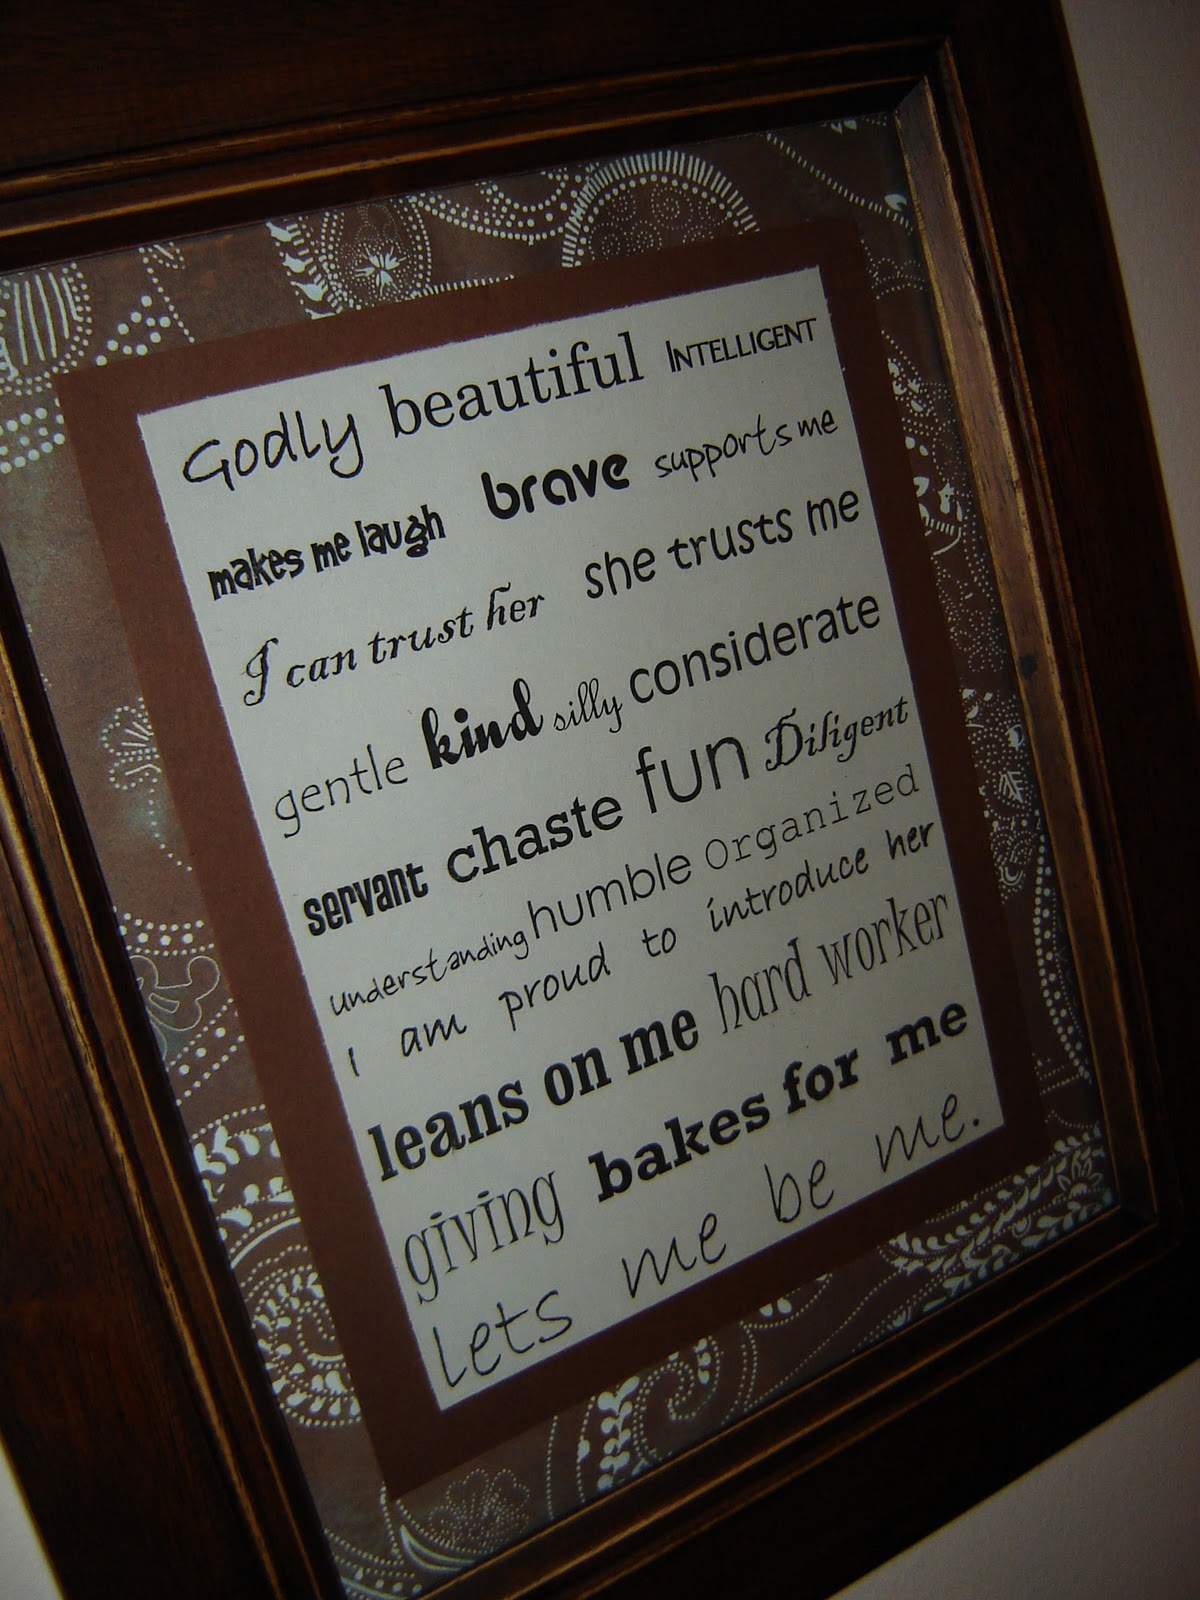
When my husband and I got engaged, we like many couples in our position attended premarital counseling together. Some of the advice we were given still makes us cringe, such as the now-infamous "foolproof" method for ending an argument with your spouse. Ready for this? It's going to blow your mind. Simply gaze into their eyes and say, "Honey, I know I'm right. But I love you more than being right. So have it your way, this time."
Not even kidding. The best part was that the counselor had us practice saying it to each other right then; that way, we'd remember it the next time we were in the middle of an argument. Awkward.
Anyway, most of the stuff we learned was helpful. Especially this challenge our counselor gave us early on in the first session: Write down twenty-five things you love about your spouse. Keep the list in a safe place and read it from time to time. My husband and I complied, read our lists out loud to each other, and then I typed them out and put them in a double-frame that has since taken up residence on my husband's dresser.

Kinda boring, huh?
I wanted to do something a little more creative with the lists, and make them more of a focal point in our room. I love this new "subway art" trend, or maybe it's not so trendy anymore, I don't know. You might be saying, "Um yeah Anne...that's SO three months ago." Or maybe you're just saying, "What the heck is subway art??" Well, I'll tell you. Or show you. Here's a cute example. And here's another one. Basically a bunch of words or phrases kind of smashed together within a set block of space. They're inspired by the way New York subway schedules used to look (hence the name).
I grabbed a couple of frames off our bedroom wall....I liked the scrapbook paper I had used in them, but I felt like that wall was becoming too overloaded with snapshots. See what I mean?

So I decided to (carefully) remove the pictures and keep the scrapbook paper intact.
Then I just went into Word and played around. I experimented with different fonts and changed up the order of the words until it was what I wanted. I also put the layout on "justified" and added spaces between the words as needed. Then I printed out my prototype.

Hee hee. This is the list my hubby wrote about me. Anyway, I liked how it looked, especially when I cut it smaller so that the paper already in the frame could act as a matte.

Our printer doesn't print in color, so I knew the only way to change things up with the actual list would be to use different paper. I picked up a value pack of cardstock that would coordinate with the colors in our room to make it a bit more interesting. (Incidentally...those value packs are on sale at Jo-Ann right now. Just throwing that out there.) Here's the finished product!

And here's the list I wrote for my husband....I updated "would make a great father someday" from my original list to "amazing father" on the new one. Just had to be done. :o)

Since I already had the frames, kept most of the paper intact, and used the fonts I already had on my computer, the only thing I needed to purchase was the cardstock. Not too shabby.
So there you go. Husband and Wife subway art...with a very special meaning.

Linking up to Creations by Kara today! I'm also going to link up the jewelry organizer that I made last week. Thanks so much for reading, and feel free to follow my blog if you want. My two followers need some company. :o)
3.28.2011
flashback feature
Um, yeah. Despite the new sewing digs, I really don't feel like doing anything remotely creative today. Maybe it's the rain, who knows. So here's a little blast from the past. And when I say, "past," I mean like February. :o)
One fateful weekend, I got brave and made this little beauty using a tutorial I found on one of my favorite blogs, Make It and Love It.

This messenger bag snaps onto the handles of the stroller, and then if you want to actually use it, you can snap on a longer strap and you're good to go. Genius, right? Really, she should patent this sucker.
Make It and Love It has a Flikr group where readers of the blog can submit photos of things they made from the blog's tutorials, so I posted this picture, mostly because I was still a little incredulous that I had actually finished it after a not-so-successful first attempt (yeah, I'm considering submitting that trainwreck to this notable site.). The author of the blog decided to post several pictures from the photo pool today, and mine was there! So crazy. My name's not anywhere on it, but it still made me smile.
Which reminds me....I might have to do a mall trip soon so I can use this bag again. I haven't used it nearly enough yet. :o)
One fateful weekend, I got brave and made this little beauty using a tutorial I found on one of my favorite blogs, Make It and Love It.

This messenger bag snaps onto the handles of the stroller, and then if you want to actually use it, you can snap on a longer strap and you're good to go. Genius, right? Really, she should patent this sucker.
Make It and Love It has a Flikr group where readers of the blog can submit photos of things they made from the blog's tutorials, so I posted this picture, mostly because I was still a little incredulous that I had actually finished it after a not-so-successful first attempt (yeah, I'm considering submitting that trainwreck to this notable site.). The author of the blog decided to post several pictures from the photo pool today, and mine was there! So crazy. My name's not anywhere on it, but it still made me smile.
Which reminds me....I might have to do a mall trip soon so I can use this bag again. I haven't used it nearly enough yet. :o)
my sewing nook!

Yes, this is technically just a corner of my dining room, but doesn't "nook" sound so much better?
Good-bye, crowded guest room closet with the daily avalanche of wrinkled fabric and tangled-up ribbon. Hello, a place for everything right where I need it.

I was finding fabric I forgot I had. Like the pretty embroidered flower fabric below. What should I use it for? :o)

Secondhand dressers....they're not just for clothes anymore. Or for bedrooms, for that matter. :o)
3.25.2011
thrifty finds: "vintage" kitchen decor
So I went to Goodwill today for the first time in several weeks, and I managed to score all this loot for around $18!

You just never know with that place, do you? There have been so many times where I walked out of there empty-handed, and yet there are a few days like today where I manage to find some cool stuff.
I found some "vintage" (in quotation marks because I'm really not sure how old they are, but hey, they look vintage-y!) canisters and what must have been an old thermos (based on the fact that it says "Icy/Hot" on it...I'm a smart one, huh?). Both kind of coordinate with my kitchen and I knew they would go well on top of my cabinets, especially since I already have a few "vintage" cookie jars up there as well.

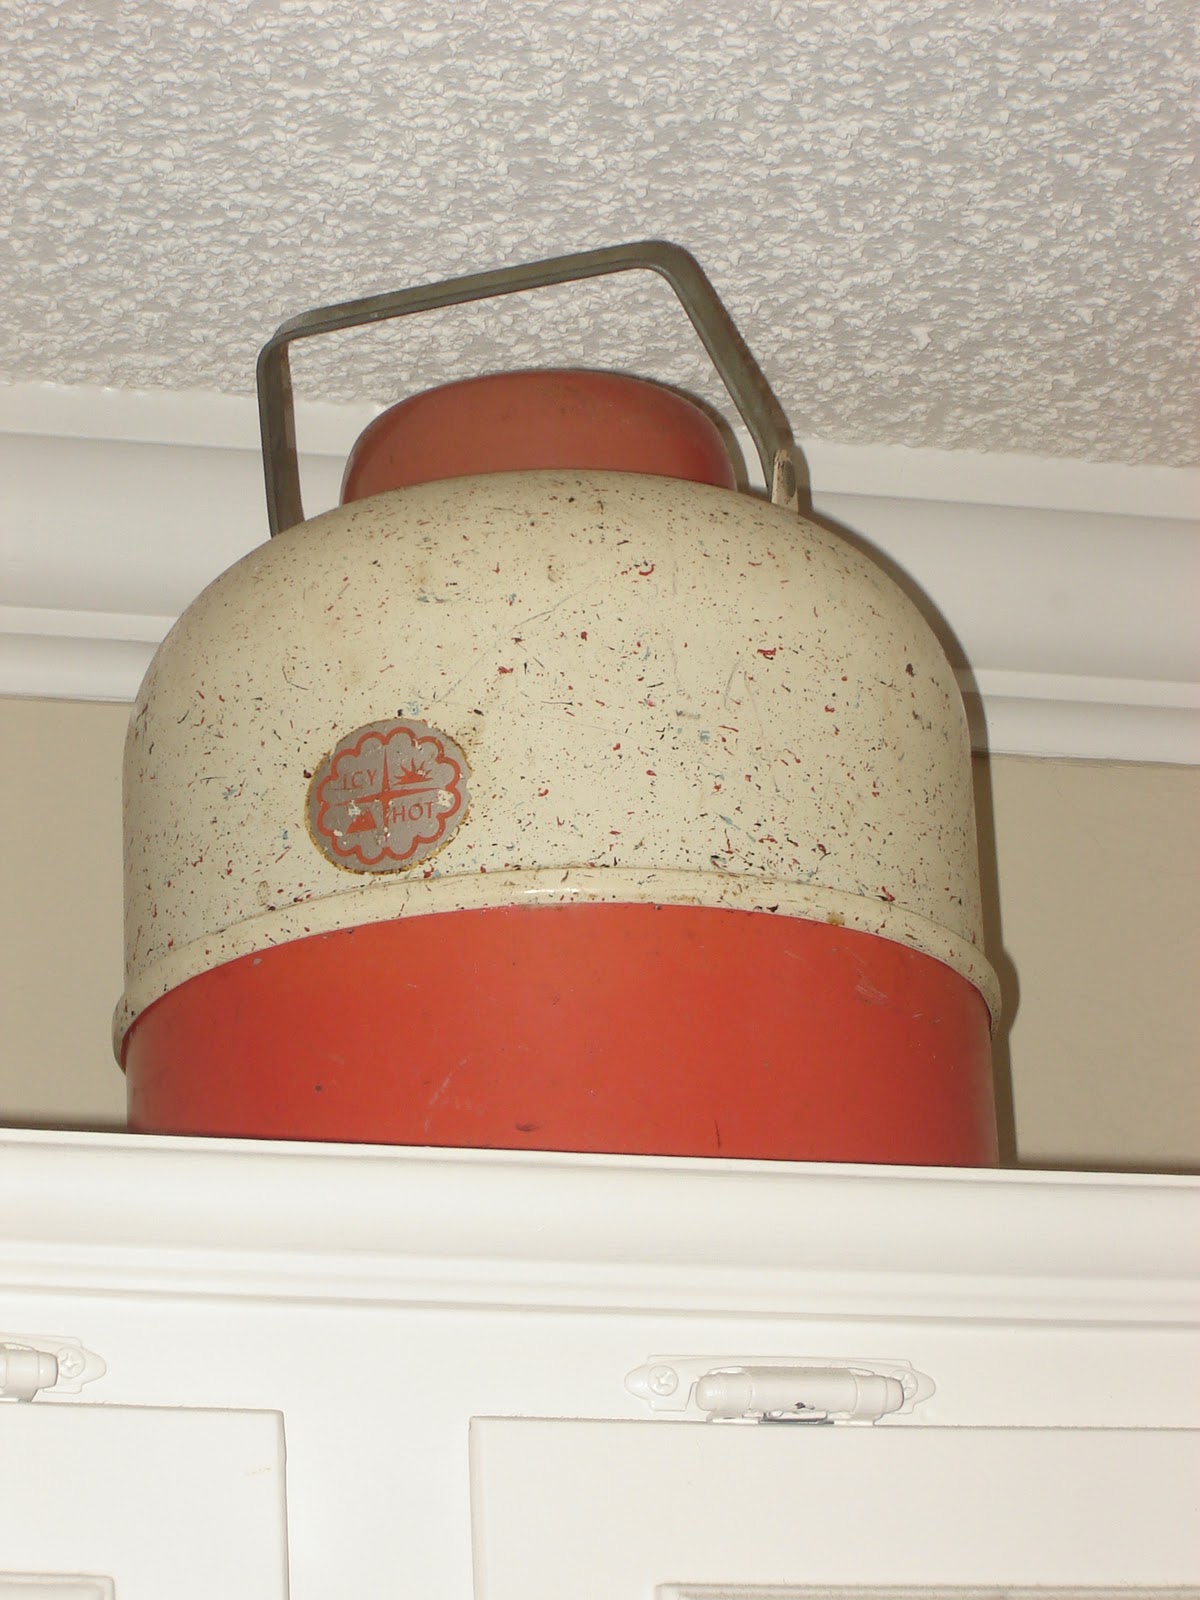
So check out your neighborhood Goodwill, even if it's a little creepy at times like mine is. You never know what kind of stuff someone just gave away that would be perfect for decorating your home on a budget.
I just have to tell you what else I got. I'm nerdy like that.
I found this cute picnic basket and figured it would work as a small sewing basket:

And a three-dollar clock in really good shape...I'm thinking of doing something like this with it. Gotta love knock-offs. :o)

I snagged a basket for a buck....I love how it has little feet on it. I'm thinking of lining it with fabric.

And finally, a sweet vintage children's book, copyrighted 1958. It reminds me of the Childcraft series of books we used to have when I was a kid.

Even if my kid isn't interested in it when he's older, there are lots of things I can do with the pages with all these cute illustrations. Maybe decorate a playroom or nursery, who knows. :o)

So now I have a few more projects on my list. And yeah, that list doesn't have an end. I'm okay with that. Have a good weekend! :o)
3.24.2011
quick fix: hanging jewelry organizer

I'm very excited about this project, mostly because it cost me next to nothing and saved me from the daily headache of going through this ridiculous mess:

I share the top of my dresser with a TV, so the little usable space I have was getting really messy. I had organizers for my necklaces and earrings, but they were overflowing and everything was always getting tangled up. I decided enough was enough.
I was originally inspired by this idea, and set out to find a cheap bulletin board since I knew I already had several choices for fabric in my stash. But then I found this beauty at Target and my plans changed.

I didn't even know they made "seagrass" bulletin boards, but our bedroom already has a lot of earth tones in it, so this would coordinate perfectly without having to be covered with fabric. Plus I couldn't pass up the price.

The only thing I wasn't a fan of was the color of the frame. I wanted it to be brown to match the rest of the room (plus the brand name was printed in bright, white letters on the bottom part of the frame so I wanted that gone too). So I covered up the seagrass part with newspaper and masking tape and then spray-painted the frame brown.

I let it dry and removed the newspaper and tape. Apparently I didn't tape the newspaper down as well as I thought, since the paint got through in some places. But I forgave myself and figured that soon those spots would be covered up anyway.

I got the hubby to help me install the hanging hardware. The frame had pre-drilled holes in it for the screws, but they were pretty small so he made them a little bigger and then the screws went right in. I think he was happy to have an excuse to use his power drill. :o)
I hung it up next to my dresser, and the jewelry hanging began today at naptime! I decided to use a combination of upholstery tacks (because they're cheap yet not cheap-looking like plastic thumbtacks would be), and some pretty covered tacks I got on clearance at Hobby Lobby.

I staggered the hanging necklaces on the bottom since I knew they'd hang down the longest, and added the bracelets above.
As you can see, there's still plenty of room on the top for more stuff. And by doing this, I found a few items I forgot I had! I was also inspired by the few pieces I've made myself, so maybe I'll get back into that soon.

But perhaps best of all is my new dresser top.

My earrings are still in their organizer, but look at all the room I have! I was able to add a few more items like that picture of my son, and a small bowl which is currently holding the leftover tacks for whenever I have a new piece of jewelry to hang. I no longer feel quite as claustrophobic or frustrated trying to find a necklace or bracelet, and that whole area of our room just looks more put together now. Yay. :o)
3.23.2011
paisley curtain

I made my first window treatment last night, and I'm actually sad that this is the best picture I could get of it with our camera. I tried all kinds of settings, with and without flash, and this is it. Sigh. Looks a lot better in person!
When my parents visited a few weeks ago, my mom gave me a quick crash course on making a window panel for the door leading to our garage, since she knew I

So I found some cute paisley fabric at Jo-Ann for 30% off and got to it. Since the window on the door isn't that wide, I figured that the natural width of the fabric (selvage to selvage) would be enough to go across the rod (my mom recommended taking the horizontal length of your window and adding at least 50% of that for the overall curtain length, and then going by the actual yardage for the vertical length, if that makes any sense). I trimmed up the other sides to get rid of the raggedy edges, since I had pre-washed this fabric and that always makes it fray a bunch.

My mom had told me to hem the sides first, since that would make finishing off the top and bottom of the curtain easier later on. I folded one side about a quarter of an inch, pressed it with an iron to make it hold, and then folded it another half of an inch and pinned it down.

I sewed all the way down the side, then did the same to the other side. Then I went on to the top. I folded the top down a half of an inch and pressed it:

Then I folded it another inch or so and pinned it down all the way across. This created a pocket for the curtain rod to go in.

I made sure the pocket was wide enough to accommodate the rod, then sewed across. I then sewed another line about a half an inch from the top, since I realized the pocket was too big and this way there would be a little ruffle at the top of the curtain (you'll see that later on).
Then I hemmed the bottom. I folded and pressed a quarter of an inch as I had done with the other sides, and then folded it over enough to fit a nickel inside. This will help weigh the curtain down so it'll hang straight and not blow around so easily. I figured since this curtain would be going on a door that would be an important thing to add (unless it's a good thing for your handmade curtain to get slammed in the door..).

I pinned this fold all the way across, and then sewed it down. Then I went back to add the nickels. I slid one in there:

And then made a vertical seam on each side to hold it in. I did the same on the other end.

I just did a nickel at each end, but looking back it might have been good to weigh the curtain down in the middle as well. But it works either way.
Next I sewed a ribbon near the bottom because I felt like it still needed something.

And then I hung that pretty thing up!
See the little ruffle on top? I guess accidentally making the rod pocket too big turned out to be a good thing. The curtain looks a tad short in this picture, but then again, it doesn't get in the way when you reach for the doorknob. And it allows for privacy, yet lets sunlight in. I opted not to line the curtain since our garage prevents direct sunlight from hitting the door; if this hadn't been the case, I probably would have lined it to prevent fading.
Not bad for my first attempt! I also got some fabric to make a valance for our master bath. I'm thinking that project will go even quicker now that I have a better idea of what the heck I'm doing. :o)
Linking up to Creations by Kara again this week....go check it out! There's so many good ideas on there already! :o)
Subscribe to:
Posts (Atom)
