Showing posts with label kids. Show all posts

3.21.2014

big boy room!

So after fixing up Micah's room a couple weeks back, I had to do something with Caleb's!  His poor walls were so bare!

I had a couple of Hobby Lobby gift cards so I decided to go there and look around.  All of their metal decor was 50% off!  I was able to get a few things there and add them to the other items I had:


I was really excited to find the multi-colored chevron hanging...they had several of these at Hobby Lobby on clearance.  All they consisted of was heavy fabric stapled onto a wooden frame; I think they had used them as a display at one time.  Most of them were kind of ugly but this one just seemed to stand out and yell Caleb's name.  So I snagged it for $8.  The horseshoe, metal "C" hanging, and gasoline sign were also all from Hobby Lobby and 50% off.  I found the mustache/top hat fabric remnant at Walmart and used it to make a dresser cover and a wall hanging (I stapled it to a cheap canvas I found at Jo-Ann).  The mailbox is from Jo-Ann...Caleb loves getting mail so I figured it would be fun to leave little notes and surprises for him in there once in a while.  I got the clock from Target; he can't tell time yet but it will be good to have when he can.  And finally, I made the Cowboy and Engineer pictures from that Goodwill book I found a few weeks back.

I hung stuff up yesterday afternoon.  I thought Caleb would come running when he heard me hammering nails into the wall, but he was distracted by a movie he was watching, so in the end it was kind of fun to see him run in there and see everything at once!  He hadn't seen any of the stuff I found so it was all a big surprise!

Here's one wall....it's the one to your right when you first walk in, between his bedroom door and his closet:
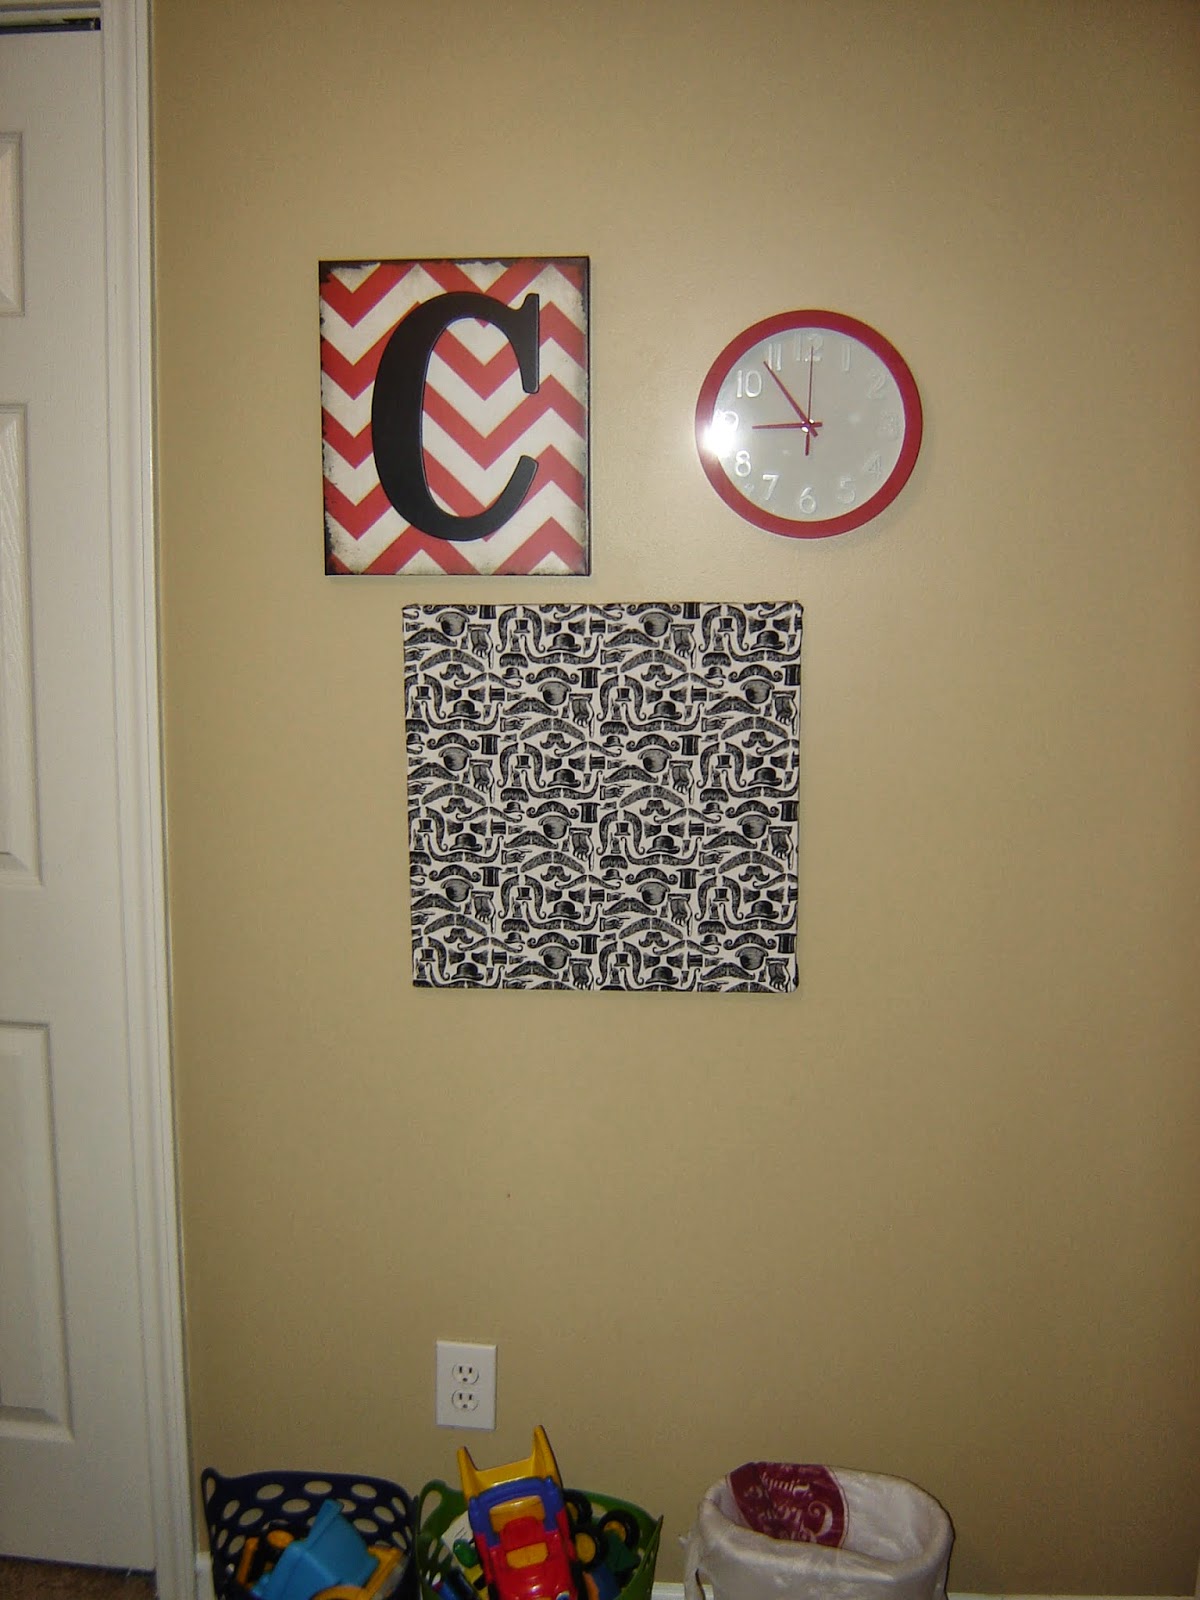


Then there's the wall by his train table...you can see it straight ahead as you walk in:


And here's what's going on over his bed:


And finally, his dresser:


Hopefully that will help it from getting scratched...and dusty.  :o)

There's still a lot of blank space above his dresser, but we can figure that out at some point.  Whatever we put there, it'll have to be like his other stuff...cheap or free!

3.19.2014

book-inspired art: Perfect Square


One of the books Caleb picked out at the library this week was Perfect Square by Michael Hall.  Turns out it's a really cool book, and a great jumping-off point for some art projects.  All you need is some construction paper, scissors, a hole punch, and a glue stick!

In the book, a square is cut, ripped, wrinkled, etc. in order to make other things.  We used the pictures in the book as a guide, but I reminded Caleb that his didn't have to look exactly like what we saw in the book.


See his dinosaur supervising?
The first object was a fountain...I drew lines on the square as a guide for Caleb and his scissors, and I helped him with the hole punching since he couldn't quite get enough grip on our hole punch to do it himself (note to self....find one that a kid can use!).


Next came a garden (this one was fun...all Caleb had to do was rip the square up into little pieces!).


Then a park (by ripping the square into strips)...he ended up doing this one by himself since his little brother needed a diaper change right then!


Then a bridge (the square was "shattered" in this case).  We were the most creative with this one since the bridge in the book was kind of intricate!


Then a river (Mommy got her pinking shears for this one!).


And finally, a mountain (lots of fun since we got to crumble up the square!).


Caleb had a lot of fun with this book.  It's just cool that a random choice he made at the library led to a good hour of creative fun (as well as an opportunity to work on his cutting and gluing skills!).

3.15.2014

velcro belt

So my four-year-old has no rear end to speak of.  Even when he wears pants with the adjustable waist set at the tightest setting, he ends up flashing the world whenever he squats down to play.  Not a good look.

I didn't want to fork over the money for a little boy belt unless I absolutely had to, so I tried this tutorial from "I Am Momma - Hear Me Roar."  I already had velcro and a D-ring on hand, so I got a yard of brown belt material at the Lobby last time I was there and gave it a try this morning.

The tutorial is super simple, and I love that she includes pictures of every step for us visual learners.  In about ten minutes we had success!

Do you see a plumber butt or Spiderman underwear?  Neither do I.

I didn't tell him to hold his shirt up this high, I promise...guess he's proud of his abs and pecs too.

I love this belt, and love that it only cost me $1.74.  But even if I had to buy the other materials, I'm betting it would have still come in under $5.  Yay for cheap boy accessories!

3.13.2014

Micah 6:8

Today I made one last thing for Micah's room.


It's a paraphrase of Micah 6:8; I came across it when I was pregnant and really wanted to eventually incorporate it into his room.  I used a frame I already had, as well as the wrapping paper from this project.  I had a lot of letter stickers left from the other hangings in the room too.  In the end it just came down to getting the handprint and footprint from Micah.  Which is easier said than done with a five-month-old.  He wanted to make a fist and curl his toes more than helping me out on this one.  :o)  So we did the best we could, and then I used one of Caleb's paintbrushes to fill in the muddled spots.  I actually used Caleb's paint too...it's non-toxic and washable, so I thought it was a pretty good option for something involving a baby. 

I'm about 90% happy with it.  Kinda wish I had used lighter-colored letters so they'd pop more against the navy blue cardstock, but since I wanted to use stuff I already had I'm okay with it for now.  We could always try again further down the road when Micah's a little older (and more cooperative with art projects!), but for now this complements the rest of the stuff in his room nicely.  Plus it adds another Scripture to his walls, so that's always a great thing in my book.  :o)

3.09.2014

there's no place like space!

So recently we took the plunge and started hanging up stuff in our house.  We're currently renting, and since we didn't anticipate being in this house for more than a year, we didn't do much decorating at first.  But since it was hard to feel settled without some homey touches, we decided to hang a few things here and there.  So glad we did!

Micah's room has gotten the most attention so far, only because it's the smallest of the bedrooms and I already had some of the decor on hand.


I made these back in September, just a month or so before Micah was born.  I had attempted to hang them with Command picture hooks, but they didn't really work.  Nails work much better!


Also found an amazing set of wall decals from Target on clearance!  I put a bunch of them above his crib, as well as over his changing table where some vintage space flashcards were already on display:


I think they do a good job in filling blank space on the wall without doing any damage since they're removable.

During a recent trip to Goodwill, I found an adorable vintage book for 77 cents:


Really, it's such a fun little book.  It has an occupation for each letter, along with a poem:


There's even a milkman in it.  A MILKMAN.  Do those guys even exist anymore?


What made it even more interesting is that a little girl had written on a few pages.  Not to be messy, but to record her hopes and dreams:


Who is this Kelly Baldwin?  When did she read this book?  Where is she now?  And did she ever realize her dream of being a nurse or a teacher?  Makes me wonder.  That's the magic of used books, I guess!

Anyway, the rest of the book was in excellent condition, so I just removed the two staples holding it together (two VERY rusty staples, might I add...glad my tetanus shot is up to date!) and then cut down the middle to get the "R" page:


I used a 12" X 12" frame I already had (hint:  get LP display frames at Michael's....they have them on sale for $4.99 a LOT and they're the perfect size for scrapbook paper!), and for the backing I used some super cute wrapping paper I found at TJ Maxx:


I am deliriously happy with how well it turned out.  And how cheaply it all came together.  77 cents for the book (with lots of usable pages leftover), $2.99 for the wrapping paper (again, lots leftover), and the frame was free.  This is hanging above his dresser, and the chevron pattern of the paper ties in well with his dresser topper:


There's still a blank wall opposite the big window in his room, so I still need to figure out something to put there.  It'll most likely be another Scripture, and I would love to use more of that chevron paper in it somehow!

2.24.2014

ivey league preschool: robots and clouds!

Here's some fun we've been having lately...totally inspired by a couple of library books!

Recently Caleb fell in love with a book called Robot Zombie Frankenstein by Annette Simon.  Very simple "plot" (a couple of robots try to outdo each other with "costumes"), but that's what makes it so funny.  He asked to read it again and again, and basically had it memorized pretty quickly.

The inside covers of the book have a bunch of shapes used to make the robots and their parts, so that inspired us to cut shapes out of construction paper to make our own robots:


Caleb actually did pretty well with his scissors...he used some of his shapes as well as some of the ones I cut out for him.  We added googly eyes to the robots when we were done.  Because googly eyes make almost anything better.

Caleb's robots...can you tell what his favorite color is??

My robots.  Caleb tends to work longer at a project if someone sits beside him and does their own.  Plus it's fun.  :o)

 We also made a really fun shoebox robot!  I covered a shoebox (complete with lid) with foil, and once it dried I let Caleb go crazy with pom-poms, stickers, googly-eyes, and pipe cleaners.  We realized that the pipe cleaners (a.k.a, robot arms, legs, and antenna) wouldn't stay on with regular white glue, so I used scotch tape instead.  Not the neatest solution ever, but it worked.


Another library book that Caleb really enjoyed was Little Cloud by Eric Carle.  He loved seeing the little cloud changing into all those different shapes.  I found several connect-the-dot activities inspired by the book on Pinterest, and Caleb enjoyed them so much.  They not only help with his pre-writing skills; they also help him remember alphabetical order and how to count past 10.  :o)

link to free printables!

I also cut out a cloud shape and let him glue cotton balls all over it to make a cloud.


And finally, one of the coolest things ever....puffy cloud paintings!  You mix 3 parts shaving cream and 1 part white glue and paint with it.  It takes awhile to dry, but when it does, it's actually soft and fluffy like a cloud!

Link to the source!

I made the bottom two paintings...I had to prompt Caleb to let the "paint" glob up to look like clouds or snowballs, and he had so much fun!  He kept touching our paintings when they were dry, saying they smelled like Daddy.  :o)

2.21.2014

ivey league homeschool: what we did for LOVE!

So last week this happened.


Still a novelty for me, having grown up mostly in Florida, but I have to say, after being stuck inside for days on end (ice is slippery, as it turns out!), the novelty wears off.  Since my husband was also home for a few days, I took advantage of the extra help and got a lot of Etsy orders done.

Of course Caleb needed some hands-on stuff to do (poor kid can only watch Olympic coverage on TV for so long), so I took advantage of the upcoming holiday to do a few fun (yet boyish) Valentine's activities.

First, we tried that thing on Pinterest where you fashion a toilet paper tube into a heart and use it as a stamp.  I had to use a paper towel roll that I cut in half, and I had to put tape around the heart once it was formed, but it worked pretty well.


Caleb was discouraged at first since his hearts weren't exactly heart-shaped.  He does this thing now where he says, "I'm just gonna give up" with a dramatic pout on his face.  Ironically all those books and songs that talk about never giving up sometimes have the opposite effect on him (almost as if it never occurred to him that giving up was an option until he was encouraged NOT to).  Silly boy!  I told him to keep trying, and he ended up loving it.  Especially when the colors mixed.

Next I just cut out a bunch of hearts for him so he could glue them into a collage.  I would have made him cut the hearts out himself (and thus shown him that hearts are symmetrical), but he's not there yet with his scissor skills.  However his glue stick skills are stellar.


Then we made a "lovebug."  I really want Caleb to learn how to spell his name soon, or at least recognize it if it's on something.  I put a letter on each heart and asked him which one went where.  He got C and A right, but needed help on the others.  Progress!


Finally, something extra special.  Caleb loves helping me make stuff in the kitchen, so I promised him we'd make special cookies for Valentine's Day.  I have a few heart-shaped cookie cutters, and found a cake mix cookie recipe where you can roll out the dough and use cutters on it. We used strawberry cake mix, resulting in some very yummy heart cookies.

Recipe source


The kid even helped me clean up afterwards.  Score!


So that's what we did for Valentine's.  Nothing too frilly or pink (unless you count the cookies).  :o)
Related Posts Plugin for WordPress, Blogger...