Showing posts with label eat your veggies. Show all posts
4.08.2014
Mommy Lunches : Baked Shrimp and Asian Slaw Egg Rolls
So right now I'm doing the Weight Watchers thing. Some weeks are better than others. But I've found that if I actually eat a substantial (yet healthy) lunch, I'm less likely to snack endlessly in the afternoon. It turns out that endless snacking can actually impede your weight loss success. Who knew? :o)
For a couple of weeks I was on a big panini kick. I got a panini press for free (yay credit card points!) and for awhile, there was nothing I wouldn't press between two pieces of bread. But lately I've been craving egg rolls. My husband isn't a fan of Chinese food so I haven't had any in a long time. I remembered a baked egg roll recipe I kind of made up a few years ago so I gave it a try again today. Yum!
I'm not a great food blogger so I didn't take pictures of every step. Hopefully my directions are clear enough! For some of the ingredients, I did a range of measurements (like 1-2 tablespoons). It all depends on your taste. Start with a little bit and then add more if you think it needs it. I was okay using 1 tablespoon each of the rice cooking wine and soy sauce. I also used nonstick cooking spray for everything since I'm trying to keep my WW points at a minimum. I got 9 egg rolls out of this recipe...it all depends on how much filling you put in each one.
2 cups of bagged broccoli slaw (plain)
12-16 frozen shrimp, thawed and cut into small pieces
1-2 tablespoons rice cooking wine
1-2 tablespoons reduced-sodium soy sauce
Pinch of onion powder
Pinch of garlic powder
Egg roll wrappers
Olive oil OR nonstick spray for pan (you could also use canola oil, grapeseed oil, whatever you like)
1. Preheat oven to 400 degrees. Spray a baking sheet with nonstick spray (or cover with parchment paper).
2. Heat oil/spray in a medium-sized skillet. Add the slaw and move it around until it's moistened by the oil and starts to wilt. Add the rice cooking wine, soy sauce, onion powder, and garlic powder. Saute further until slaw is softened.
3. Add shrimp and continue to saute until the shrimp turns pink (this only takes two or three minutes). Add more rice cooking wine, soy sauce, seasonings, etc. if desired.
4. Take skillet of heat and set out the egg roll wrappers and a small bowl of water. Place a wrapper on a plate and moisten all the sides with a little water. Put a couple of tablespoons of the mixture into the center of the egg roll and wrap it up according to the directions on the back of the package. Place each egg roll seam-side-down on the baking sheet.
5. Spray the egg rolls with nonstick spray (or brush with oil), then sprinkle a little salt on top. Bake at 400 degrees for 10-12 minutes or until golden brown. Allow to cool for at least 5 minutes before eating (these suckers are HOT inside!).
Yum! While these are pretty yummy on their own, a good dipping sauce wouldn't hurt. And keep in mind that an egg roll wrapper is basically a blank canvas. You can use cabbage instead of the broccoli slaw, or add more veggies and leave out the shrimp, or use other sauces or oils you find in the Asian cooking aisle of the grocery store, or go crazy and fry them as nature intended. Have fun with it! :o)
Note: According to my calculations, each egg roll is 2 WW points. This is based on a yield of 9 egg rolls. Keep in mind that using oil instead of nonstick cooking spray and/or altering the ingredients will affect the nutrition and points value.
5.21.2012
fun with veggies
In an effort to eat more vegetables, I tried a few new recipes over the past week and I loved every one of them. I even have high hopes that maybe one day my husband will also partake in one or two of these. :o)
First, baked zucchini sticks with sweet onion dip. This one is a bit more labor-intensive than what I normally do, but totally worth it. The dip tastes better after at least an hour in the fridge, too. The recipe for this can be found here.
Next, roasted green beans with parmesan. This recipe is SO simple. Roasting the green beans makes them nice and crispy, and really, not so much like green beans anymore. And even parmesan cheese from a can is crazy-delicious after it gets all browned in the oven. I ate these with leftover sweet onion dip and it was almost like eating a snack version of green bean casserole. YUM. You can find the green bean recipe here.
Finally, baked squash chips. No kidding. A friend at church has a garden, so yesterday a bag of yellow squash was up for grabs. I got three small ones and decided to try this recipe today. The trick is to use a cooler oven (200 degrees) and just leave them in there for 2 or 3 hours (mine took around 2 and a half). So they're super simple to prepare, it's just a waiting game until they're done. They're worth the wait though because they really do get crispy like normal chips. They just shrink a lot, so the amount you see in that picture was seriously from three squashes (and of course I ate all of them!). Next time I'm going to season them better; I was paranoid about putting TOO much salt on them, but I don't think I put enough on there. I might try some pepper or garlic powder next time too! You can find the recipe here.
I'm very excited about these new recipes and how well they turned out. Even if they take a little work beforehand, they're worth it if only to help me eat a little better. Enjoy!
First, baked zucchini sticks with sweet onion dip. This one is a bit more labor-intensive than what I normally do, but totally worth it. The dip tastes better after at least an hour in the fridge, too. The recipe for this can be found here.
Next, roasted green beans with parmesan. This recipe is SO simple. Roasting the green beans makes them nice and crispy, and really, not so much like green beans anymore. And even parmesan cheese from a can is crazy-delicious after it gets all browned in the oven. I ate these with leftover sweet onion dip and it was almost like eating a snack version of green bean casserole. YUM. You can find the green bean recipe here.
Finally, baked squash chips. No kidding. A friend at church has a garden, so yesterday a bag of yellow squash was up for grabs. I got three small ones and decided to try this recipe today. The trick is to use a cooler oven (200 degrees) and just leave them in there for 2 or 3 hours (mine took around 2 and a half). So they're super simple to prepare, it's just a waiting game until they're done. They're worth the wait though because they really do get crispy like normal chips. They just shrink a lot, so the amount you see in that picture was seriously from three squashes (and of course I ate all of them!). Next time I'm going to season them better; I was paranoid about putting TOO much salt on them, but I don't think I put enough on there. I might try some pepper or garlic powder next time too! You can find the recipe here.
I'm very excited about these new recipes and how well they turned out. Even if they take a little work beforehand, they're worth it if only to help me eat a little better. Enjoy!
3.13.2012
in the kitchen: peachy-green smoothie
I've been making smoothies for me and my son a lot lately. They make the perfect post-nap snack without ruining his appetite for dinner, and they provide an excellent opportunity to hide stuff he wouldn't normally eat. He would drink strawberry smoothies all day long, but you can't get him to eat an actual strawberry on its own. Go figure.
Recently I've been adding spinach to pretty much every smoothie we eat. You can't taste the spinach at all, and the green color doesn't seem to bother my son either. Then again, he normally eats cooked spinach with gusto. Either way, smoothies are an easy way to get some veggies in his diet (and mine!).
Here's a favorite of ours. It's enough for two servings, thereabouts. Keep in mind that I estimate the measurements of everything....feel free to increase or decrease wherever you want.
Peachy-Green Smoothie
The Ingredients.
1 cup frozen sliced peaches
1 cup frozen cubed mango
1/2 to 3/4 cup orange juice
3/4 cup lowfat vanilla yogurt
2 cups fresh spinach leaves
Optional: 2 tablespoons wheat germ and/or 2 tablespoons ground flaxseed
The Method.
Put the frozen peaches and mango in a bowl and microwave on high for 45 seconds. You want the fruit to only get partially thawed out, that way you don't have to add ice to the smoothie (that just waters it down). Put the partially thawed fruit in the blender, and follow with 1/2 cup orange juice, the yogurt, and the wheat germ/flaxseed (if using). Blend on high for a few seconds to make sure everything starts incorporating. Add additional orange juice if needed. Then add the spinach leaves and blend for 30 seconds or so. If the spinach gets hung up, use a spoon to work it down a bit. Pour into two glasses (or in our case, one glass and one sippy cup with straw) and enjoy!
All you taste is peach and mango goodness, I promise. And the spinach can be added to other smoothie combinations too; just keep in mind that adding it with darker colored fruit (like berries) will result in a brownish-colored smoothie, not the pretty vibrant green of this particular smoothie. :o)
So throw in some spinach next time you mix up a smoothie....work it in for St. Patrick's Day, and then keep that fun tradition going year-round. :o)
9.17.2011
eat your veggies: zucchini oven chips
These things rock. You really don't need to know anything else. Just look at the picture. YUM.
I found this recipe through Cooking Light's website, and only modified it a little based on the ingredients I had on hand and the baking temperature. This is enough for four people, but when I make them I scale the recipe way down since I'm the only one who eats them. Here goes!
Zucchini Oven Chips
(adapted from Cooking Light)
The Ingredients.
1/4 cup dry Italian breadcrumbs
1/4 cup grated Parmesan cheese (the stuff in the can is fine)
1/4 tsp salt
1/4 tsp garlic powder
1/8 tsp black pepper
2 tablespoons milk
1 large or 2 small zucchini, sliced into 1/4-inch slices
The Method.
Preheat oven to 400 degrees. Line a baking sheet with foil, and then place an ovenproof wire rack on top of that. Spray the wire rack with nonstick spray.
Now, this is the amount of zucchini I use since I usually only want to make enough for one person.
Use however much you want to, just adjust the other ingredients as necessary.
Combine the first five ingredients in a medium bowl. Place the milk in a another bowl. Set up an "assembly line" that looks like this.
{That bowl to the left has milk in it...I know it looks empty but it's not. :o) } Dip the zucchini slices in milk, then dredge in the breadcrumb mixture. Place the coated pieces on the prepared wire rack.
Spray the zucchini with more nonstick spray to help the browning process along. Bake for 20-25 minutes or until browned and crisp. The original recipe says 30 minutes at 425 degrees, but I'm always afraid of burning mine so I opt for the slightly lower oven temperature. My oven must be good and hot because after 22 minutes or so, my zucchini look like this.
Yeah they look better in person. Anyway, serve these guys immediately while they're hot and crispy. The thinner you slice them, the crispier they get (and also the easier they burn, so watch them!). I like mine with warmed-up marinara or pizza sauce.
Enjoy!
Linked up to Creations by Kara!
9.08.2011
eat your veggies: pumpkin parmesan soup
Yes, you read right. Pumpkin soup. Trust me on this one.
Back when my son was just a few months old, I saw someone on the Food Network making pumpkin soup. After I got over the initial "um, YUCK" reaction, I have to say it started looking pretty good. Plus the woman making it actually used canned pumpkin. I can't stand it when TV chefs tell you to buy a pumpkin and roast and puree it yourself. I'm just lazy that way.
Anyway, I printed out the recipe and tried it a few weeks later. I've made it a few more times since then and each time it's SO GOOD. I've tweaked this recipe quite a bit, mainly because the original called for some kind of hazelnut-cheese decoration on top (which is apparently called a "frico." That's right. A freak-o). I liked the idea of cheese since I knew it paired well with squash and other veggies similar to pumpkin, but the hazelnuts didn't appeal to me. Though the frico did look quite sheek-o on the TV. :o) Also, I left out the celery because my husband and I both don't like it, as well as the sage, mostly because I usually don't have fresh herbs on hand. In my opinion, it tastes great without it, but feel free to view the original recipe and use the different ingredients as you wish.
Pumpkin Parmesan Soup
(adapted from Food Network's Ultimate Recipe Showdown)
The Ingredients.
4 tablespoons unsalted butter
1/2 cup finely chopped onion
1/3 cup finely chopped carrot
1 teaspoon ground cinnamon
3/4 teaspoon ground ginger
1/4 teaspoon nutmeg
2 1/2 teaspoons minced garlic
1 cup half-and-half
1/4 cup cornstarch
3 cups chicken broth
1 15 oz. can pumpkin puree
1/3 cup firmly packed brown sugar
1 teaspoon salt
1/2 teaspoon pepper
1/3 to 1/2 cup grated Parmesan cheese
The Method.
Melt the butter in a large pot over medium heat until it starts to brown and foam, about two to three minutes. Don't let it burn! Stir in the onion, carrot, cinnamon, ginger, and nutmeg, and cook until tender, stirring frequently. Stir in the garlic and cook for another minute.
Stir together the half-and-half and cornstarch in a separate bowl and then pour the mixture into the pot. {Make sure the cornstarch has fully dissolved in the half-and-half before adding it to the pot, since cornstarch often clumps up if added straight to hot mixtures. Don't ask me how I know that.} Add the chicken broth, pumpkin, brown sugar, salt, and pepper. Bring to a boil over medium-high heat, stirring frequently. When the soup starts to thicken, reduce the heat to low. Use an immersion blender to puree the soup to a smooth consistency (or else just puree it in the blender in small batches). Simmer until ready to serve. Ladle the soup into bowls and then top with a generous sprinkle of Parmesan cheese.
For me, the last minute addition of the cheese on top totally makes this soup. It kind of breaks up the pumpkin-cinnamon flavor so you taste a little saltiness as well. I'm also a fan of the fact that this soup gets its creamy texture by using half-and-half and cornstarch rather than lots of heavy cream. I even use fat free half-and-half and it comes out yummy every time. Plus I love any excuse to use my immersion blender, which is a testament to the fact that it's possible to receive a wedding gift that you didn't register for but still adore. How often does that happen? :o)
Enjoy!!
Linking up with Creations by Kara!
7.29.2011
eat your veggies: kale chips
Today I tried to sew a cute top like this one....and it bombed.
Then tonight I tried to sew another skirt like this one....and it bombed.
To be honest, I think I know what went wrong on both counts. And I can always try again. But it stinks to know that I wasted a whole naptime doing battle with the shirt, and then another hour and a half tonight trying to make that skirt.
Here's something that did go right today. Awhile back I saw a quick blurb about oven-baked kale chips in a magazine, and then a week ago my mom mentioned seeing them somewhere too. I can't recall ever even trying kale, perhaps because the only way it was ever presented to me was a yucky, sloppy mess (and yes, I know I'm a weird Southern girl because I don't like collard greens or turnip greens or any other kind of slow-cooked stringy green stuff. But since I mostly grew up in Florida, I think I can be excused just this once). But apparently kale is one of the healthiest vegetables on the planet, and while I try to eat spinach regularly I usually don't eat any other dark green leafy veggies. So today when I was grocery shopping, I bought a little bunch of kale for 98 cents and figured I'd given it a try. Here's how I did it.
The Ingredients.
Kale (figure two or three leaves per person)
Olive oil
Salt and pepper to taste
The Method.
Preheat oven to 350 degrees, and line a baking sheet with foil for easy clean-up. Depending on the amount of kale you use, you may need more than one baking sheet. Since it was just me, I only used a few leaves of kale and one baking sheet.
Make sure the kale has been washed, and then cut away the stem and the tough inner "ribs" of each leaf of kale. Tear the leaves into bite-sized pieces and place in a large bowl. Add olive oil and seasonings and toss. Lay out in a single layer on the baking sheet and bake for 12-15 minutes or until crispy and brown at the edges.
So these were surprisingly good. The chips actually do get very crispy, almost to the point where they are more fragile than potato chips. Now they do still have a slight "kale-ish" aftertaste, but if you like vegetables already it shouldn't bother you. Even my toddler ate a small bite. My main gripe with mine was that some of them ended up being a little too salty, but I still ate them all. Next time I'm going to try just spraying the leaf bits with nonstick spray and then sprinkling them with the seasonings and see if that works just as well. It might also be fun to experiment with different seasonings, like cumin or cayenne pepper or garlic! I still have a TON of that 98-cent bunch left, so this is also a very economical side dish.
I did google a few recipes for this, and one called for baking the kale chips at a lower temperature (275 degrees) for 20 minutes, stirring them halfway through. Not sure if this is a better way to do it, but if anything it may help keep you from burning them since they seem to brown up pretty fast at 350! They should be yummy either way. Enjoy!
Then tonight I tried to sew another skirt like this one....and it bombed.
To be honest, I think I know what went wrong on both counts. And I can always try again. But it stinks to know that I wasted a whole naptime doing battle with the shirt, and then another hour and a half tonight trying to make that skirt.
Here's something that did go right today. Awhile back I saw a quick blurb about oven-baked kale chips in a magazine, and then a week ago my mom mentioned seeing them somewhere too. I can't recall ever even trying kale, perhaps because the only way it was ever presented to me was a yucky, sloppy mess (and yes, I know I'm a weird Southern girl because I don't like collard greens or turnip greens or any other kind of slow-cooked stringy green stuff. But since I mostly grew up in Florida, I think I can be excused just this once). But apparently kale is one of the healthiest vegetables on the planet, and while I try to eat spinach regularly I usually don't eat any other dark green leafy veggies. So today when I was grocery shopping, I bought a little bunch of kale for 98 cents and figured I'd given it a try. Here's how I did it.
The Ingredients.
Kale (figure two or three leaves per person)
Olive oil
Salt and pepper to taste
The Method.
Preheat oven to 350 degrees, and line a baking sheet with foil for easy clean-up. Depending on the amount of kale you use, you may need more than one baking sheet. Since it was just me, I only used a few leaves of kale and one baking sheet.
Make sure the kale has been washed, and then cut away the stem and the tough inner "ribs" of each leaf of kale. Tear the leaves into bite-sized pieces and place in a large bowl. Add olive oil and seasonings and toss. Lay out in a single layer on the baking sheet and bake for 12-15 minutes or until crispy and brown at the edges.
So these were surprisingly good. The chips actually do get very crispy, almost to the point where they are more fragile than potato chips. Now they do still have a slight "kale-ish" aftertaste, but if you like vegetables already it shouldn't bother you. Even my toddler ate a small bite. My main gripe with mine was that some of them ended up being a little too salty, but I still ate them all. Next time I'm going to try just spraying the leaf bits with nonstick spray and then sprinkling them with the seasonings and see if that works just as well. It might also be fun to experiment with different seasonings, like cumin or cayenne pepper or garlic! I still have a TON of that 98-cent bunch left, so this is also a very economical side dish.
I did google a few recipes for this, and one called for baking the kale chips at a lower temperature (275 degrees) for 20 minutes, stirring them halfway through. Not sure if this is a better way to do it, but if anything it may help keep you from burning them since they seem to brown up pretty fast at 350! They should be yummy either way. Enjoy!
6.17.2011
eat your veggies: sweet potato "fries"
Yep, another sweet potato post. But sweet potatoes are one of the few veggies my husband will eat, and our son pretty much loves them, so I try to use these whenever I can. Here's a good recipe for oven-baked sweet potato fries that I use all the time.
The Ingredients.
2-3 sweet potatoes, depending on size (just eyeball it once you cut them up...if you think you need more, cut up another one!)
1 tablespoon olive oil
Salt and pepper to taste
Cinnamon to taste
The Method.
Preheat oven to 400 degrees, and line a baking sheet with foil. Spray the foil with nonstick spray and then set aside. Wash sweet potatoes, and peel if desired; we usually leave the skin on, but it gets kind of tough in some places so kids may not like them this way. I usually peel them for my son once he's about to eat them.
Then the business of cutting the sweet potatoes into fries...kind of a trial and error thing. You have to work with the shape of the potato (long, skinny potatoes work best), and that means there's really no tried-and-true method for cutting them. I usually just make sure my fries are about 1/4 inch thick, and two to three inches long. You can make them thicker if you want, but they might take longer to bake or else just be mushy.
Anyway, once you have all the fries cut, put them in a bowl and drizzle them with the olive oil. Add in the salt, pepper, and cinnamon, and then shake the bowl around till all the fries are coated. Empty them out onto the baking sheet and spread them out until they're in a single layer. Bake for 20 minutes, stir them around, and then bake for an additional 5-10 minutes, or until golden brown and crusty around the edges. Be sure to watch them at this point; they seem to go from "golden brown" to "black" pretty quickly! Let cool for a few minutes, and then serve with ketchup.
You can eat these without much guilt since they're sweet potatoes (which is basically the BEST vegetable for you out there), they require very little oil, and they're baked instead of fried. I've come to prefer these to regular fries (unless you're talking about the waffle fries from Chick-Fil-A. No comparison there). I hope you like them!
6.06.2011
eat your veggies: sweet potato pancakes
So my toddler has unknowingly eaten carrots, squash, zucchini, and sweet potatoes this week. He's actually a very good eater for someone his age, but he gets a little picky with the veggies sometimes. Since he has a weakness for anything in bread form, I've been sneaking veggie purees into muffins, breads, and pancakes. I've borrowed heavily from the cookbook Deceptively Delicious by Jessica Seinfeld, and so far her recipes have worked out great for me. Except one.
Her sweet potato pancakes look wonderful in the picture, complete with syrup dripping down the sides. And somehow she accomplished this using just pancake mix, water, sweet potato puree, and cinnamon. Not sure how she got her pancakes to be so fluffy and yummy-looking without using eggs or milk. Let's just say my first batch of pancakes looked nothing like the picture in the cookbook. They actually looked like this.
Aren't you proud of me for sharing this ultimate FAIL with you? :o)
I still had enough sweet potato puree for another batch, so I took a deep breath, scraped the gooey remains of the first batch off our griddle, and experimented a bit. {How's this for funny. My kid still ate a couple of the "ruined" pancakes. I figured since there were no eggs in them there really wasn't anything in there that could harm him if he ate them like that. He thought they were good. Go figure.} And as luck would have it, the second batch came out great. Here it is!
The Ingredients.
1 cup pancake mix (I used Aunt Jemima's Whole Wheat Blend pancake mix to get some whole grains in there)
1 cup buttermilk (or regular milk)
1 egg
1/2 cup sweet potato puree
1/4 cup water
1/4 to 1/2 tsp cinnamon (to taste)
The Method.
Preheat your skillet or griddle to medium-high heat. Mix all of the ingredients together until combined. Coat the skillet or griddle with oil or nonstick spray, and begin to spoon the batter onto it using a 1/4 cup measure. Cook for 3 minutes, or until bubbles start to form and the edges are firm. Flip the pancakes and cook for another 3 minutes on the second side. Repeat with the remaining batter. Server with an additional sprinkle of cinnamon or a little syrup.
Note: I actually had our griddle up pretty high, and I think it took my pancakes longer than 3 minutes per side to cook. This batter tends to be thicker than most pancake batters because of the sweet potato puree, so that might have been why. You may want to add a little more water to the batter until it's the consistency you like, and also play around with the temperature and cooking time since it may vary.
I thought these tasted very good. And using pancake mix as a base made them really easy to make. I kept a few out for breakfast tomorrow, and put the rest in the freezer. Along with zucchini-blueberry bread slices. And peanut butter and jelly muffins with carrot puree. And applesauce muffins with squash puree. Sneaky sneaky. :o)
5.31.2011
eat your veggies: zucchini calzones
{see the yummy cheese oozing out of that calzone on the right? YUM. }
Don't you love it when some odds and ends from your fridge turn into something pretty good? I whipped these up for lunch today and while they looked pretty scary when I first put them in the oven, they came out looking much more inviting. And you can't beat getting a serving of veggies hidden within a yummy pocket of bread and cheese and pizza sauce!
These would work with any combination of meats, cheeses, and veggies. I just used what I had on hand. Next time I might try to make a whole-wheat pizza dough, bake a big batch of these, and freeze them. Especially if my toddler ends up liking these too!
The Ingredients.
1 roll of refrigerated pizza dough
1/2 cup pizza sauce
1 to 1 1/2 cups shredded mozzarella cheese
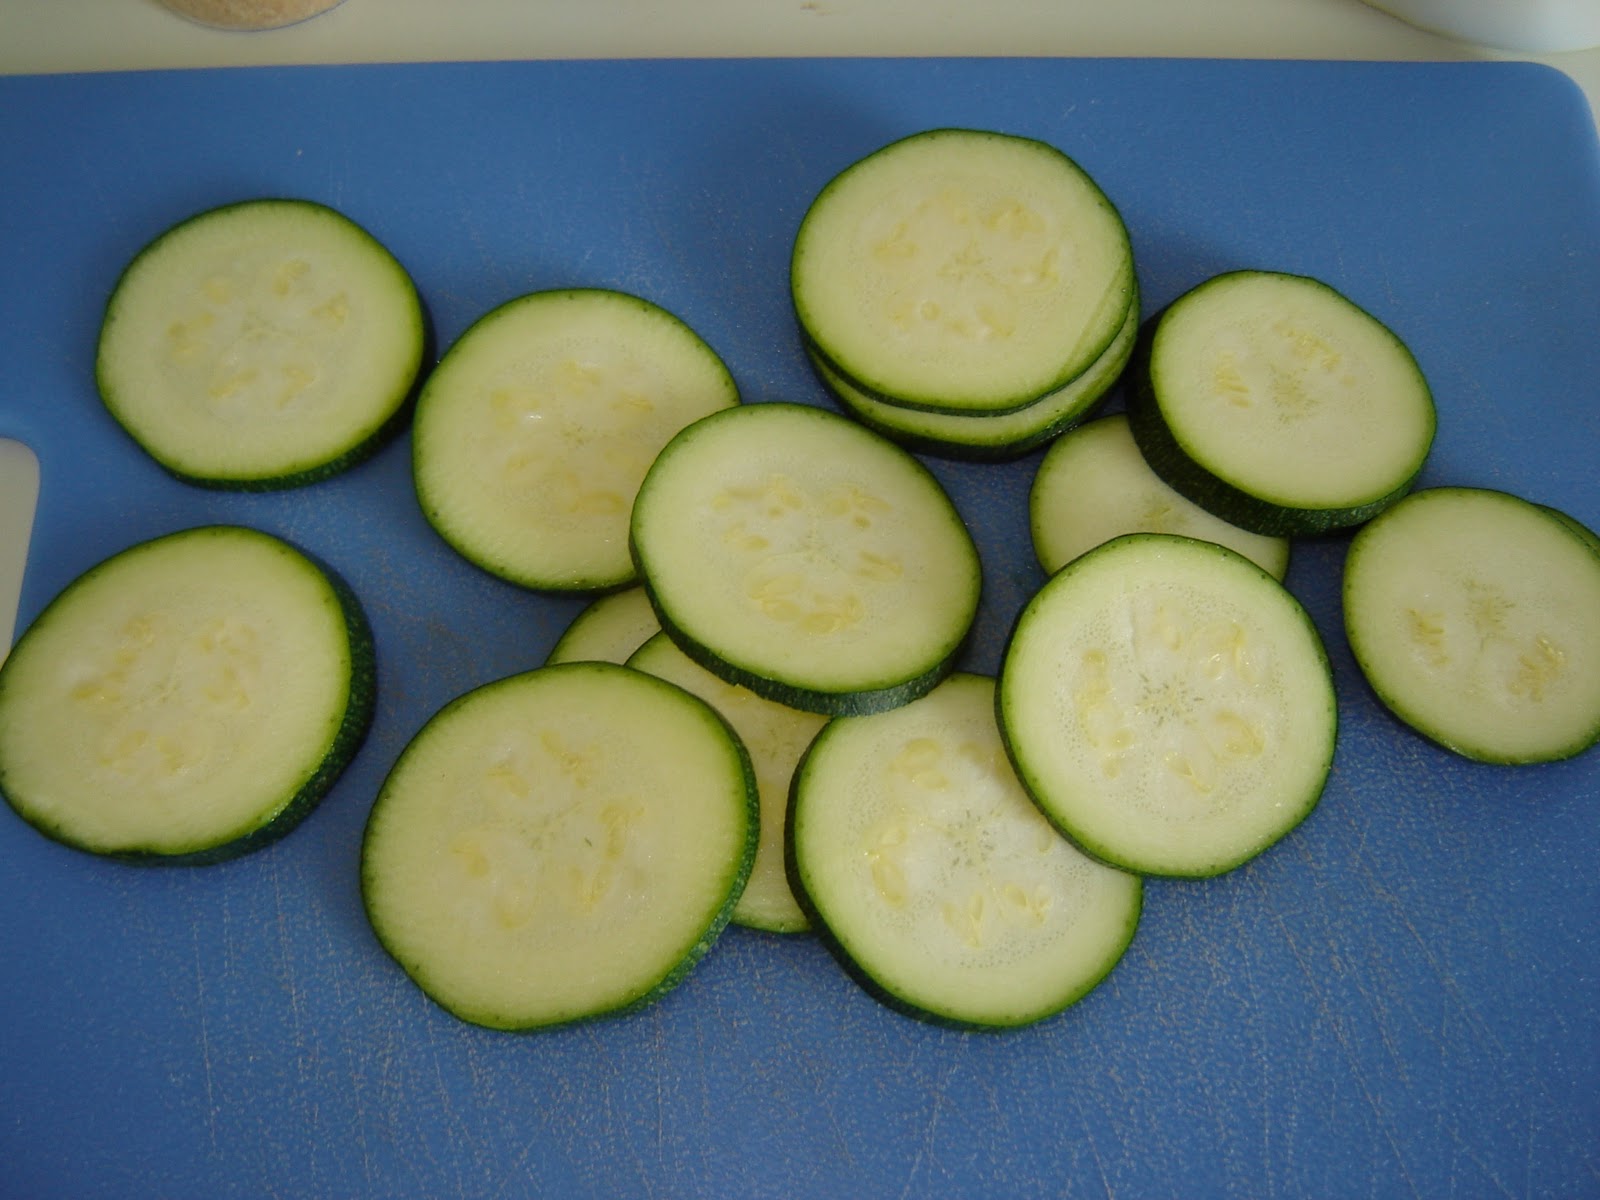
One small zucchini, thinly sliced
The Method.
Heat a skillet over medium-high heat. Saute the sliced zucchini in a little olive oil, salt, and pepper. Add any other spices you want (garlic powder or oregano would be good!).
Once the zucchini is a little brown, soft, and starting to fall apart, transfer it to a plate lined with a paper towel to get some of the oil out.
Unroll the dough out and use your hands to gently press it down until it's about a quarter-inch thick. Use a knife to divide it into six rectangles.
{Yes, that's how gimpy my dough looked. For some reason, pizza dough does not like to cooperate with me. Not to mention I have a small heart attack every time the stupid tube pops open. Anyway, if there's any tears or holes, just repair them the best you can. No biggie.}
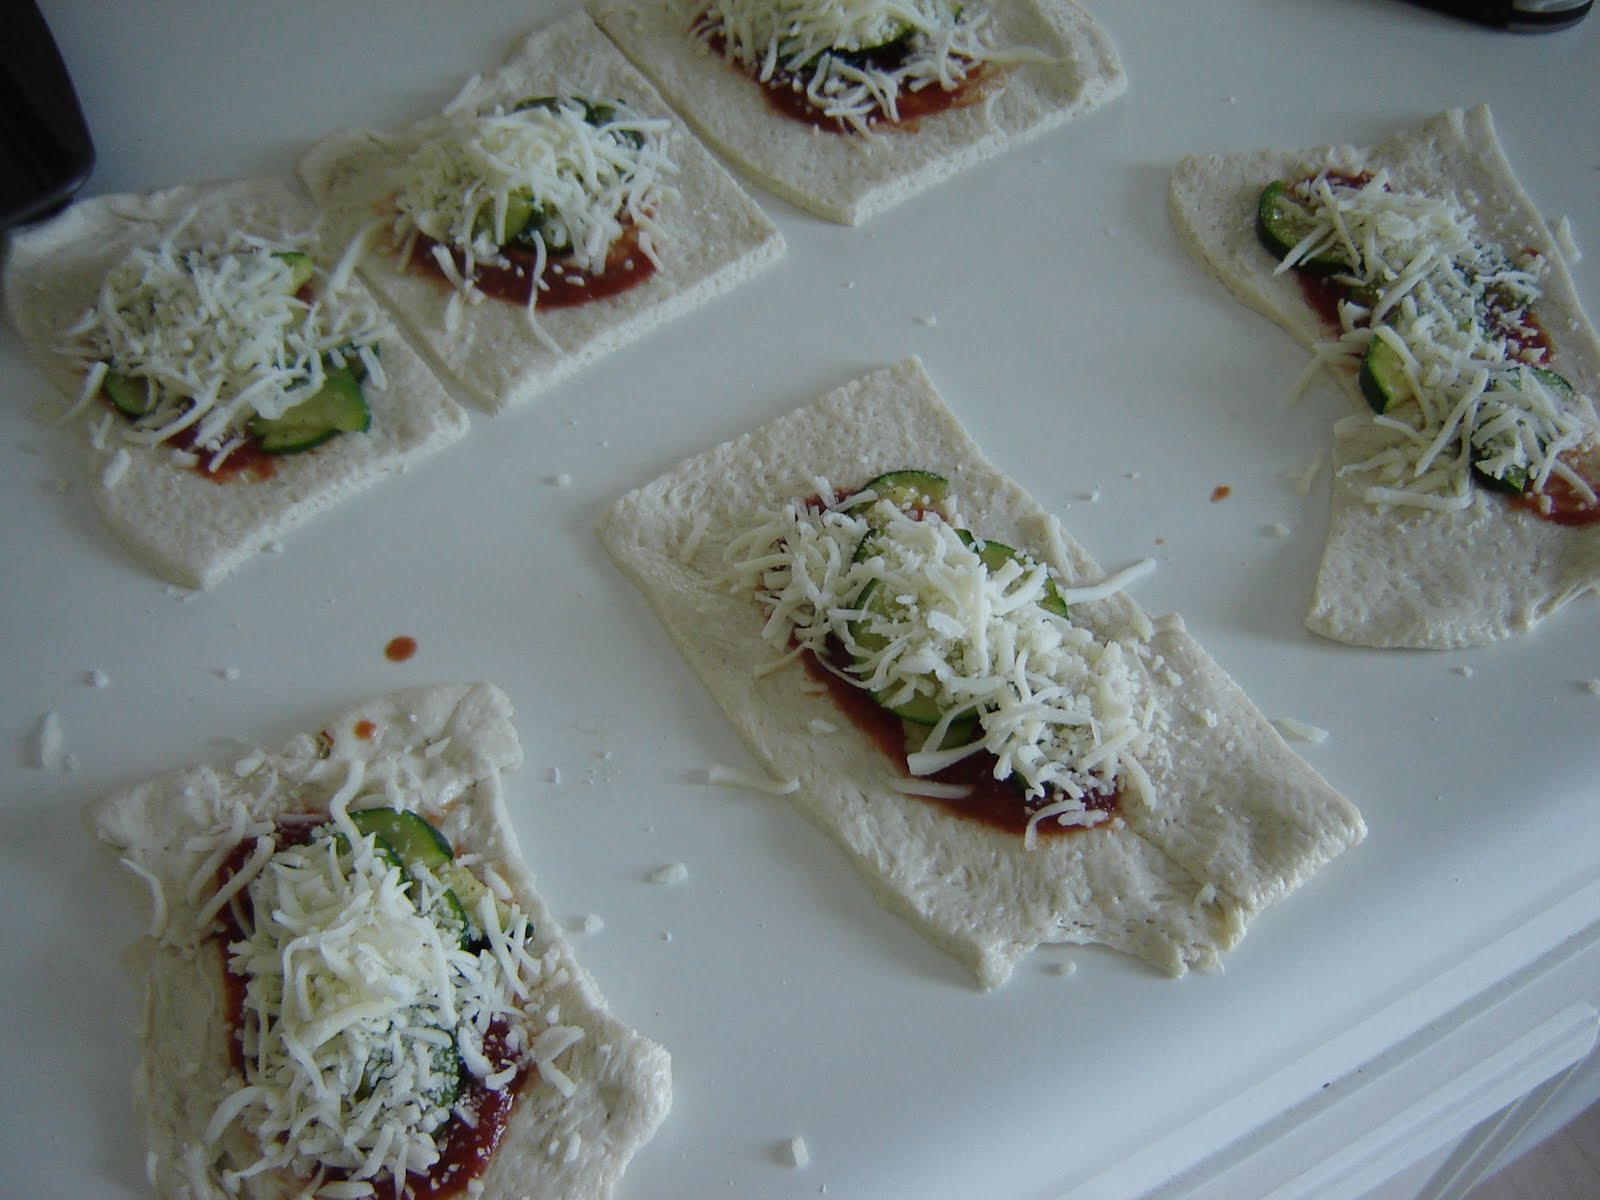
Start loading your toppings. I decided to do a layer of sauce, then the zucchini, the the cheese.
Then roll them up. I tried it a couple of different ways; I think the easiest way is to fold one short side over the filling, then the other short side on top of that, and then pinch the open sides shut. If that makes any sense at all. Guess it depends on how stretchy your dough is and how much patience you have. I was hungry and just wanted them done, so mine ended up like this:
Yikes. Be sure to cut a slit in each calzone to help the steam escape, but if yours end up like mine you probably won't have to! Put them on a greased baking sheet and bake at 400 degrees for 12 to 15 minutes or until golden brown. I sprayed mine with nonstick spray before I put them in the oven to help the browning process. And they came out like this:
Don't you love it when some odds and ends from your fridge turn into something pretty good? I whipped these up for lunch today and while they looked pretty scary when I first put them in the oven, they came out looking much more inviting. And you can't beat getting a serving of veggies hidden within a yummy pocket of bread and cheese and pizza sauce!
These would work with any combination of meats, cheeses, and veggies. I just used what I had on hand. Next time I might try to make a whole-wheat pizza dough, bake a big batch of these, and freeze them. Especially if my toddler ends up liking these too!
The Ingredients.
1 roll of refrigerated pizza dough
1/2 cup pizza sauce
1 to 1 1/2 cups shredded mozzarella cheese
One small zucchini, thinly sliced
The Method.
Heat a skillet over medium-high heat. Saute the sliced zucchini in a little olive oil, salt, and pepper. Add any other spices you want (garlic powder or oregano would be good!).
Once the zucchini is a little brown, soft, and starting to fall apart, transfer it to a plate lined with a paper towel to get some of the oil out.
Unroll the dough out and use your hands to gently press it down until it's about a quarter-inch thick. Use a knife to divide it into six rectangles.
{Yes, that's how gimpy my dough looked. For some reason, pizza dough does not like to cooperate with me. Not to mention I have a small heart attack every time the stupid tube pops open. Anyway, if there's any tears or holes, just repair them the best you can. No biggie.}
Start loading your toppings. I decided to do a layer of sauce, then the zucchini, the the cheese.
Then roll them up. I tried it a couple of different ways; I think the easiest way is to fold one short side over the filling, then the other short side on top of that, and then pinch the open sides shut. If that makes any sense at all. Guess it depends on how stretchy your dough is and how much patience you have. I was hungry and just wanted them done, so mine ended up like this:
Yikes. Be sure to cut a slit in each calzone to help the steam escape, but if yours end up like mine you probably won't have to! Put them on a greased baking sheet and bake at 400 degrees for 12 to 15 minutes or until golden brown. I sprayed mine with nonstick spray before I put them in the oven to help the browning process. And they came out like this:
Not too shabby. Let them cool down for at least five minutes before eating. I really liked these a lot; the zucchini had a good texture since I sauteed it first, and it kind of just melted into the cheese and the bread so it wasn't too overpowering. Next time I might try spinach. Or sliced tomatoes. I think just about anything would work here.
Now go eat some veggies. :o)
5.03.2011
eat your veggies: cheesy squash patties
{Any of you have a catchier, more appetizing name for this recipe? Let me know...haha!}
It seems to me that every year, the recommended daily amount of servings for fruit and vegetables increases. Fruit usually isn't a problem for me; veggies get trickier. I like most of them, but my husband hates most of them, and our son falls somewhere in between. I usually get lazy about eating enough veggies since at times I'm the only one eating them, but I've resolved to do better. Wanna join me? Keep checking back for more "eat your veggies" recipes and ideas!
Here's a recipe I kind of made up. I was watching the Food Network a year or so ago and noticed Paula Deen making some yummy patties out of squash and zucchini. I tried the recipe, but had a few issues. One, she didn't use enough cheese (I know, go figure. She usually puts a pound of butter in everything but for once opts to go healthy). Two, she was kind of unclear about how thick to make them. Mine turned out kind of mushy in the middle. Yuck. And three, the recipe was intended for more than just one veggie-eating person, so there was a lot leftover (and they were even mushier warmed over. Double yuck).
So I adapted the recipe to make it work for me. This recipe uses just one or two pieces of yellow squash (depending on size), but you could also substitute zucchini or do a mixture if you prefer.
Cheesy Squash Patties (really, the name is killing me! Trust me, they taste better than they sound!)
(adapted from Paula Deen)
The Ingredients.
2 small-to-medium-sized squash
1/2 cup seasoned breadcrumbs
1/4 cup grated Parmesan cheese
1/2 cup shredded cheddar cheese
1 egg, lightly beaten
Dash of salt
Dash of pepper
The Method.
This recipe makes about 10 patties, so make sure you share them. Heating up the leftovers in the microwave equals mushy, not-as-yummy-as-before mounds of squash, so these are definitely best right after you make them.
What do you think? I think you should try them. Then you could say you ate a vegetable today. :o)
It seems to me that every year, the recommended daily amount of servings for fruit and vegetables increases. Fruit usually isn't a problem for me; veggies get trickier. I like most of them, but my husband hates most of them, and our son falls somewhere in between. I usually get lazy about eating enough veggies since at times I'm the only one eating them, but I've resolved to do better. Wanna join me? Keep checking back for more "eat your veggies" recipes and ideas!
Here's a recipe I kind of made up. I was watching the Food Network a year or so ago and noticed Paula Deen making some yummy patties out of squash and zucchini. I tried the recipe, but had a few issues. One, she didn't use enough cheese (I know, go figure. She usually puts a pound of butter in everything but for once opts to go healthy). Two, she was kind of unclear about how thick to make them. Mine turned out kind of mushy in the middle. Yuck. And three, the recipe was intended for more than just one veggie-eating person, so there was a lot leftover (and they were even mushier warmed over. Double yuck).
So I adapted the recipe to make it work for me. This recipe uses just one or two pieces of yellow squash (depending on size), but you could also substitute zucchini or do a mixture if you prefer.
Cheesy Squash Patties (really, the name is killing me! Trust me, they taste better than they sound!)
(adapted from Paula Deen)
The Ingredients.
2 small-to-medium-sized squash
1/2 cup seasoned breadcrumbs
1/4 cup grated Parmesan cheese
1/2 cup shredded cheddar cheese
1 egg, lightly beaten
Dash of salt
Dash of pepper
The Method.
- Heat a large skillet over medium-high heat. Either spray with nonstick spray, or use about a tablespoon of olive oil, whatever you prefer.
- Wash and dry the squash, cut the tips off, and then shred with a grater.
- Gather up the shredded squash in a clean kitchen towel and wring to get all the excess liquid out. I find the cotton towels work better than paper towels for this job.
- Place squash shreds in a medium-sized bowl. Add the rest of the ingredients and mix with clean hands until combined. Add more breadcrumbs or cheese as needed.
- Form into small patties, about two inches in diameter, and about a half-inch thick. Working in batches, lightly pan-fry patties in the skillet, about 3-4 minutes per side.
- They should be browned on either side when they're done (it also helps to lightly press on them with a spatula once you've flipped them; make sure you do this after they've been flipped though since the raw sides will stick to the spatula). Transfer to a paper-towel-lined plate to cool slightly, and continue with the rest of the patties.
This recipe makes about 10 patties, so make sure you share them. Heating up the leftovers in the microwave equals mushy, not-as-yummy-as-before mounds of squash, so these are definitely best right after you make them.
What do you think? I think you should try them. Then you could say you ate a vegetable today. :o)
Subscribe to:
Posts (Atom)