Today I re-arranged and re-organized all of my sewing stuff, so I came across some unfinished projects. Like this rice bag; I was about two-thirds of the way done a couple months ago, but ran out of rice. Today I finished it and it's ready to use! And given the fact that I started the Couch-to-5K running program this week, I might use this sooner rather than later (I know, I must be insane).
You either put it in the freezer for an hour or so, or heat it up in the microwave for a couple minutes, depending on your pain-relief weapon of choice. It has three separate compartments so the rice doesn't all flow to one side, along with some heavy-duty belting for the handles. I used this tutorial from Make It and Love It and had no problems. To be honest, this was my second time making one of these. The first was for my dad last Christmas:
Note the masculine fabric choice. Gotta love discounted remnants. I think they're responsible for at least a third of my fabric collection. :o)
I tried to take additional pictures of the one I made today, but sadly our camera appears to be dying. Even with new batteries, it turns off after a minute of use (or even less if I'm using the flash), and no amount of coaxing can cause it to cooperate. Given the fact that we have a growing boy and I haven't taken pictures of him in awhile, I hope we can fix this problem soon!
Showing posts with label tutorials. Show all posts
7.28.2011
4.23.2011
quick fix: splat mat
Have a messy kid? I sure do. I guess it could be a lot worse, but I feel like I'm constantly scrubbing that section of floor underneath his high chair. Even if my kid loves the food I give him, some of it still finds its way onto the floor. And you know what happens if I don't wipe it up right away; it becomes that much harder to scrape off later.
Around the first of the year, I found a huge rectangular plastic-coated tablecloth on clearance at Ross for $3. I cut it in half and put one section of it underneath the highchair; the plastic coating made the food a lot easier to clean up, even if it had been given time to become fossilized. :o)
Here's the problem, though. My kid learned to walk. That tablecloth became a hazard for him (and, let's face it, for Mommy too) since the other side of it was slick. Plus it was kind of flimsy so it was difficult to pick up and move around anyway. I ended up trashing it last week because it was pretty much beyond help.
Today during naptime I fixed the problem using the other half of the tablecloth. Caleb's "splat mat" is now thicker, more durable, and (most importantly) completely slip-proof. Wanna know how I did it? Sure you do. :o)
First I took the remains of the tablecloth and laid it out to see what I had to work with.
Then I folded it in half, right sides together, to make a long rectangle. My kid's messes tend to fall on either side of his chair, so I wanted more coverage on the sides for sure. I pinned everything and then sewed along three of the four sides.
Then I turned the whole thing right-side-out through the side I had left open, and then smoothed everything out the best that I could. I also pinned that open side shut so I could sew it closed when I went back to top-stitch everything. But before the top-stitching, I wanted to add another feature:
Grippy shelf liner! This stuff is great for more than just lining shelves; in fact, we use this to keep our son's diaper changing pad on the changing table. It provides just enough friction to keep stuff in its place, and with a very cheap pricetag at that. The dollar store sells five-foot rolls of this stuff, so I got two rolls and got to it.
I unrolled both rolls of shelf liner and cut them in half lengthwise. Then I just started pinning the shelf liner along all four sides sides of the mat, trimming and overlapping as needed. I sewed the liner down, about 1/4 inch from the edge. Then I went back and sewed all along the inside edges of the liner to completely secure it to the bottom of the mat. I was a little concerned about how the shelf liner would fare under the sewing machine needle, but it worked great; the only thing that slowed me down was getting the pins out as I sewed, since some of them really needed a strong tug to get loose from the shelf liner. So when I was done, the mat had a border of shelf liner all along the outside edges.
Then I flipped it over and tested it. I walked all over it and it didn't move at all! No more slipping or sliding around! Plus by sewing the tablecloth in half first, I made a double-layer mat so it's much sturdier and easier to pick up for cleaning if needed. Ha, "if needed." That's a laugh. I'm sure my son will be glad to christen this latest creation at his very next meal. :o) Linking up at Creations by Kara and A Little Tipsy!
3.23.2011
paisley curtain
I made my first window treatment last night, and I'm actually sad that this is the best picture I could get of it with our camera. I tried all kinds of settings, with and without flash, and this is it. Sigh. Looks a lot better in person!
When my parents visited a few weeks ago, my mom gave me a quick crash course on making a window panel for the door leading to our garage, since she knew I
Yuck.
So I found some cute paisley fabric at Jo-Ann for 30% off and got to it. Since the window on the door isn't that wide, I figured that the natural width of the fabric (selvage to selvage) would be enough to go across the rod (my mom recommended taking the horizontal length of your window and adding at least 50% of that for the overall curtain length, and then going by the actual yardage for the vertical length, if that makes any sense). I trimmed up the other sides to get rid of the raggedy edges, since I had pre-washed this fabric and that always makes it fray a bunch.
My mom had told me to hem the sides first, since that would make finishing off the top and bottom of the curtain easier later on. I folded one side about a quarter of an inch, pressed it with an iron to make it hold, and then folded it another half of an inch and pinned it down.
I sewed all the way down the side, then did the same to the other side. Then I went on to the top. I folded the top down a half of an inch and pressed it:
Then I folded it another inch or so and pinned it down all the way across. This created a pocket for the curtain rod to go in.
I made sure the pocket was wide enough to accommodate the rod, then sewed across. I then sewed another line about a half an inch from the top, since I realized the pocket was too big and this way there would be a little ruffle at the top of the curtain (you'll see that later on).
Then I hemmed the bottom. I folded and pressed a quarter of an inch as I had done with the other sides, and then folded it over enough to fit a nickel inside. This will help weigh the curtain down so it'll hang straight and not blow around so easily. I figured since this curtain would be going on a door that would be an important thing to add (unless it's a good thing for your handmade curtain to get slammed in the door..).
I pinned this fold all the way across, and then sewed it down. Then I went back to add the nickels. I slid one in there:
And then made a vertical seam on each side to hold it in. I did the same on the other end.
I just did a nickel at each end, but looking back it might have been good to weigh the curtain down in the middle as well. But it works either way.
Next I sewed a ribbon near the bottom because I felt like it still needed something.
And then I hung that pretty thing up!
See the little ruffle on top? I guess accidentally making the rod pocket too big turned out to be a good thing. The curtain looks a tad short in this picture, but then again, it doesn't get in the way when you reach for the doorknob. And it allows for privacy, yet lets sunlight in. I opted not to line the curtain since our garage prevents direct sunlight from hitting the door; if this hadn't been the case, I probably would have lined it to prevent fading.
Not bad for my first attempt! I also got some fabric to make a valance for our master bath. I'm thinking that project will go even quicker now that I have a better idea of what the heck I'm doing. :o)
Linking up to Creations by Kara again this week....go check it out! There's so many good ideas on there already! :o)
3.16.2011
reversible placemats
Last week my parents came up for a visit! My dad recently retired and they're about to move into a different house, so they're purging a lot of stuff to make the move easier. One thing they offered me is the kitchen table they've had for the last twenty years. That may sound old to some of you, but it's in great shape and seats six people instead of four like our current one, so I jumped at it. (For those of you who are wondering, our old table and chairs are now taking up residence at the house of prayer. Come visit them sometime!)
The table looks great in our dining room, but I immediately realized that I only have one set of six placemats. Since our old table sat four people, I usually only bought placemats in sets of four. So I decided to make some that were reversible. Here's how I did it.
Materials for a set of six reversible placemats:
1 1/2 yards each of two coordinating fabrics and batting
4 packages of extra-wide double-fold bias tape
Matching thread
Old placemat to use as a template
First, take an existing placemat and trace it onto paper or posterboard so you'll have a template when cutting out your fabric. I liked the size of this one, but feel free to experiment with different shapes; square or ovals would be fun too.
Next, pin the template onto your fabric and batting and cut around, leaving a half-inch on all sides for seam allowance. The easiest way to do this is to make a fabric and batting sandwich: lay one fabric wrong-side up, then put your batting on top of it, then put the other fabric on top right-side up. That way, once your placemat is cut out, all you have to do is un-pin (if that's a word) the template, and replace the pins back in the fabrics and batting, and you're all set for the next step.
Next, we'll need to quilt it to keep the layers together. With this method, there's no turning it right-side out since the bias tape will act as a border, so all you need to do is sew straight lines across the placemat. I chose to do straight vertical lines since one of my fabrics allowed for that, though horizontal lines, diagonal, or even free-motion quilting could work too. Again, just play around with it. I chose red thread since my bias tape is red and it matched both fabrics.
Do this with all six placemats, and then take a deep breath. It's time for the bias tape.
Don't be scared. I'm here for you. :o) Okay, well maybe you've used this stuff before and aren't as intimidated by it as I was. But in case you're unfamiliar with this stuff, it really is simple to use once you get the hang of it. First, we're going to do the longer sides of the placemat. Take the bias tape out of the package and measure out enough of the tape to go across one of the longer sides, leaving about half an inch on both sides.
Next, see how the bias tape unfolds and leaves creases?
Pardon my un-manicured hands. :o) Anyway, take one edge of the unfolded bias tape and line it up with the raw edge of the placemat.
Pin it all the way down the length of that side. Next, see that crease right above the edge? That's going to be your path for the seam. Put the placemat underneath the foot of your sewing machine so the needle will line up with that crease, and then sew all the way down.
And no, it's not just you. It's dark in this picture because the lightbulb in my sewing machine burned out. I practically went blind making these. :o) Anyway, now we're ready to fold the bias tape over to attach it to the other side. Take the other side of the bias tape, leaving that other fold intact, and fold it over the raw edge. Make sure it covers the raw edges and pin it into place.
Sew all the way down, as close to the edge as you can get.
Now we're ready to put the tape on the shorter sides. Attach the bias tape on one of the shorter sides like you did before.
Now, in the process of folding it to the other side, you're going to want to tuck the edges of the other pieces of bias tape in there to make nice corners. Here's how I did it. First, take the overlap from one of the longer sides and trim it so it'll fit inside the the other (in the picture below, the vertical tape is the long side and the horizontal tape is the short side we're about to fold over):
Next, fold in the overlap on the short side so it lines up with the tape on the long side:
And then continue folding the short bias tape to cover up the raw edge; this will secure the previous fold you made.
Pin in place, and do the same to the other corner. Sew down close to the edge like you did before. Do the same to the other short side, and guess what. You're done with your first placemat!
Now repeat 5 more times. :o) I'll admit, the first one I did is kind of gimpy-looking if you look really close, but as I got the hang of the scary bias tape, the other ones came out better and faster. And now I have six placemats, really two sets of six if you think about it since I used two different fabrics:
Our table looks so pretty now.
I'm also going to attempt my first "linky party" to showcase this project, since I'm still a little amazed that I pulled this off. :o) Check out the party here for some other great ideas!
3.12.2011
quick fix: button cover fridge magnets
So several months ago I came across a cute idea for little girl hair ties at Make It and Love It. I thought this was a good gift idea for one of my nieces, who had a birthday coming up at the time. So I went out and got the button cover kit (just a few bucks at Walmart or a craft store; plus if you have a coupon or they're having a sale it's even cheaper!) and made three little covered buttons:
Here's the problem, though. I couldn't find any hair ties that would fit through the back of the button covers. I found the skinniest ones available, and they wouldn't fit no matter how much I tried to squeeze them in there. Maybe the author of the tutorial used a different brand of button covers, I don't know. But I quickly gave up and these buttons got tossed into my sewing basket to collect some dust. (In case you were wondering, I ended up making my niece a cute scarf using this tutorial instead...she loved it so I guess this craft fail was meant to be.)
Fast forward to today, when I realized that I could take these buttons and my lack of refrigerator magnets and turn this mess into one of those "when life gives you lemons" situations. This is also literally a five minute project; less if you have your buttons already covered like I did! All you need is a button cover kit, some fabric scraps, a glue gun, and some magnets.
Before you start, pick out your fabric scraps and use the directions on the back of the button cover kit to make the buttons. Easy peasy.
Then, plug in your glue gun to get it nice and hot, and get your magnets out as well.
I already had this roll of magnets from Hobby Lobby, but you could also just cut up those free flat magnets you get from local businesses to give this project an even smaller price tag.
Next, see that hook on the back of the button cover? The one that was too tiny and narrow to accommodate any kind of hair tie? :o) Use your thumb to fold it down as flat as you can.
You could probably also try using wire cutters to just cut it off altogether. I just knew if I had small pieces of metal flying everywhere I'd have to vacuum the floor when I was done, and I was that lazy. :o)
Next cut off two magnet pieces that can fit inside that border on the back of the button. I decided to use two because my magnets were so flat to begin with, but one piece might have worked okay. Also, if you buy thicker magnets (or the ones that are circular to begin with), you could skip this step. It all depends on what you have on hand.
My magnets had a sticky back that you peel off to adhere, but I didn't trust that to stick to the button all by itself, so I used a dab of hot glue to stick those suckers on.
Not the neatest job, but guess what....it's the back and no one sees that part. Only you will know. :o) Give the glue a few minutes to dry completely, and your magnets are ready to use!
Now you have something to hold up those appointment reminder cards, favorite photos, or your kids' artwork. Mine doesn't do artwork yet, unless you count throwing food on the floor just to see what it will look like. And you can't stick that to the fridge. :o)
I really like how these turned out....so much that I'm sad I only have three, so I'll have to make some more soon. Thanks for reading!
3.07.2011
crayon roll
I've mentioned before that I have eight nieces and nephews. Two of them have birthdays coming up so I decided to give this crayon roll tutorial from Prudent Baby a try. I didn't know such things existed, but they're actually a cute idea and really not that hard to put together. And with those words I will now attempt my first official tutorial....here goes!
Materials:
3 18" x 6" rectangles of coordinating cotton fabric
1 18 x 6" rectangle of lightweight interfacing
18" of matching ribbon
Matching thread
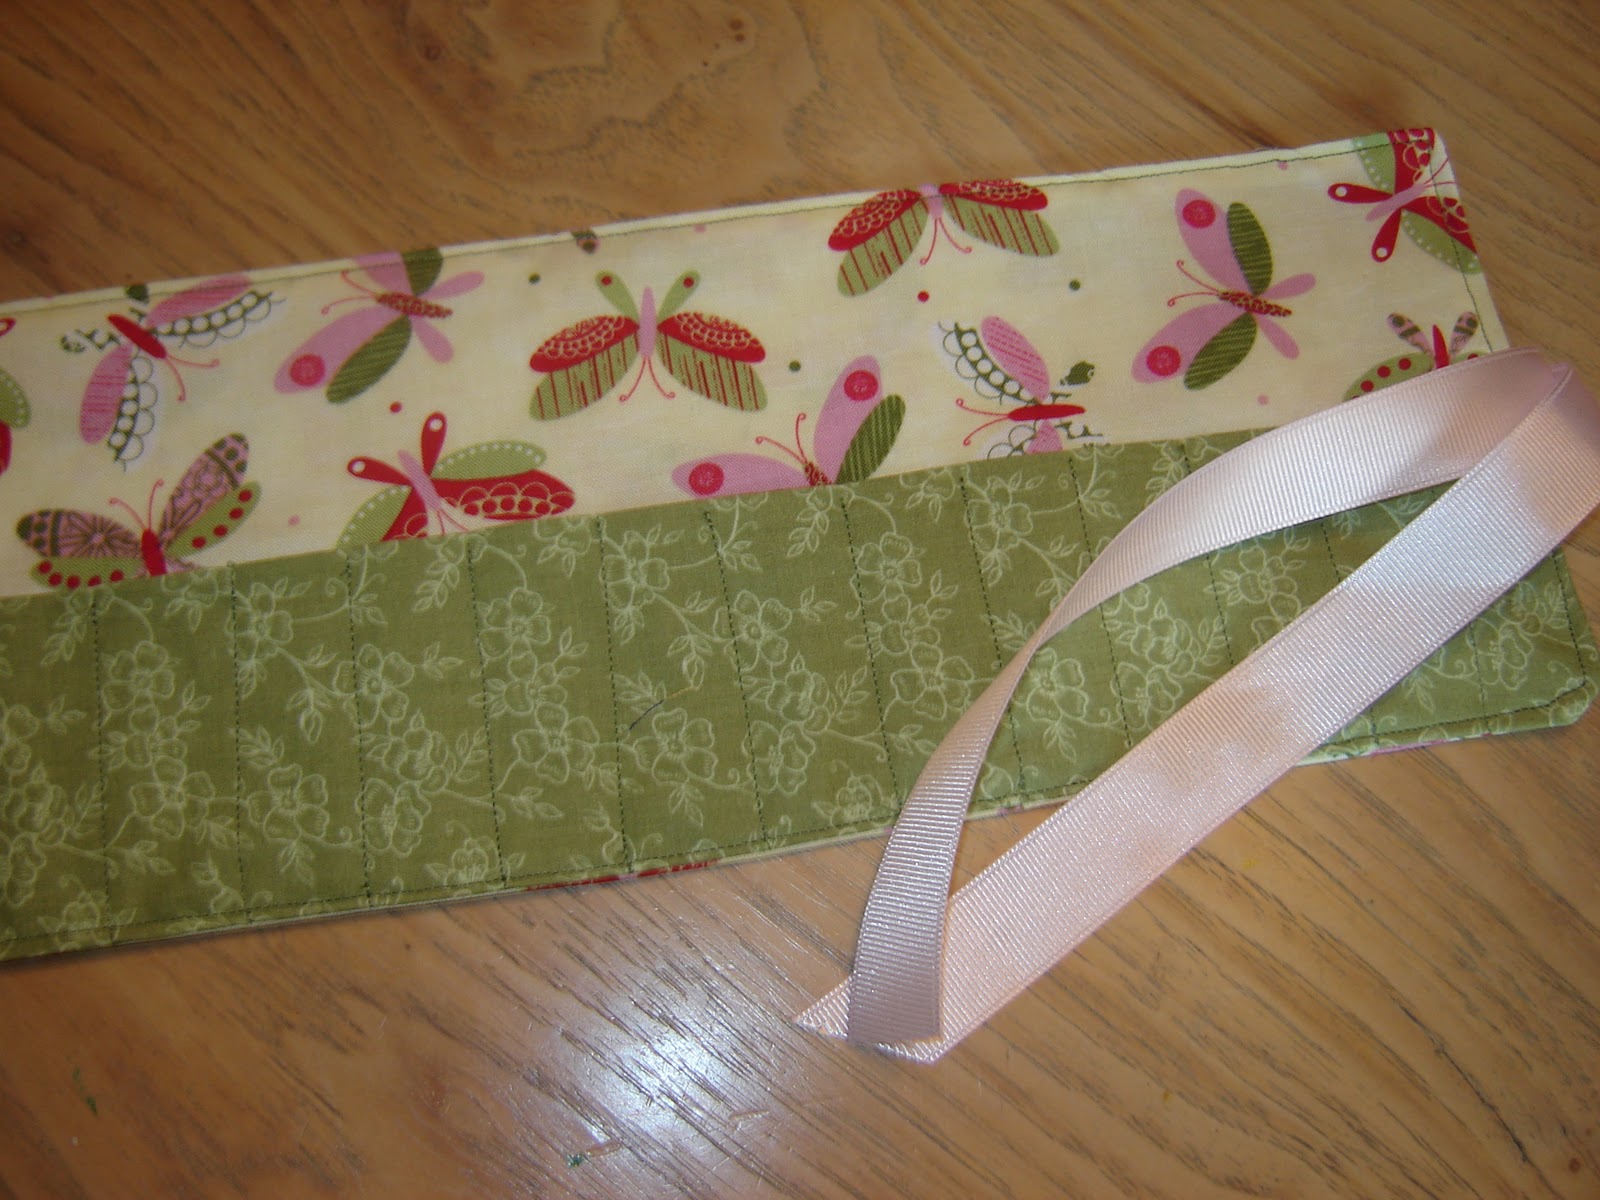
First, lay out your rectangles and decide which one you want to use for the pocket, the inside, and the outside (the outside is what you'll see when the roll is rolled up). I ended up using the same fabric for the inside and the outside for my crayon rolls (yes, I did both of these at the same time because they're that easy. "N" gets the creepy crawlers and "H" gets the butterflies).
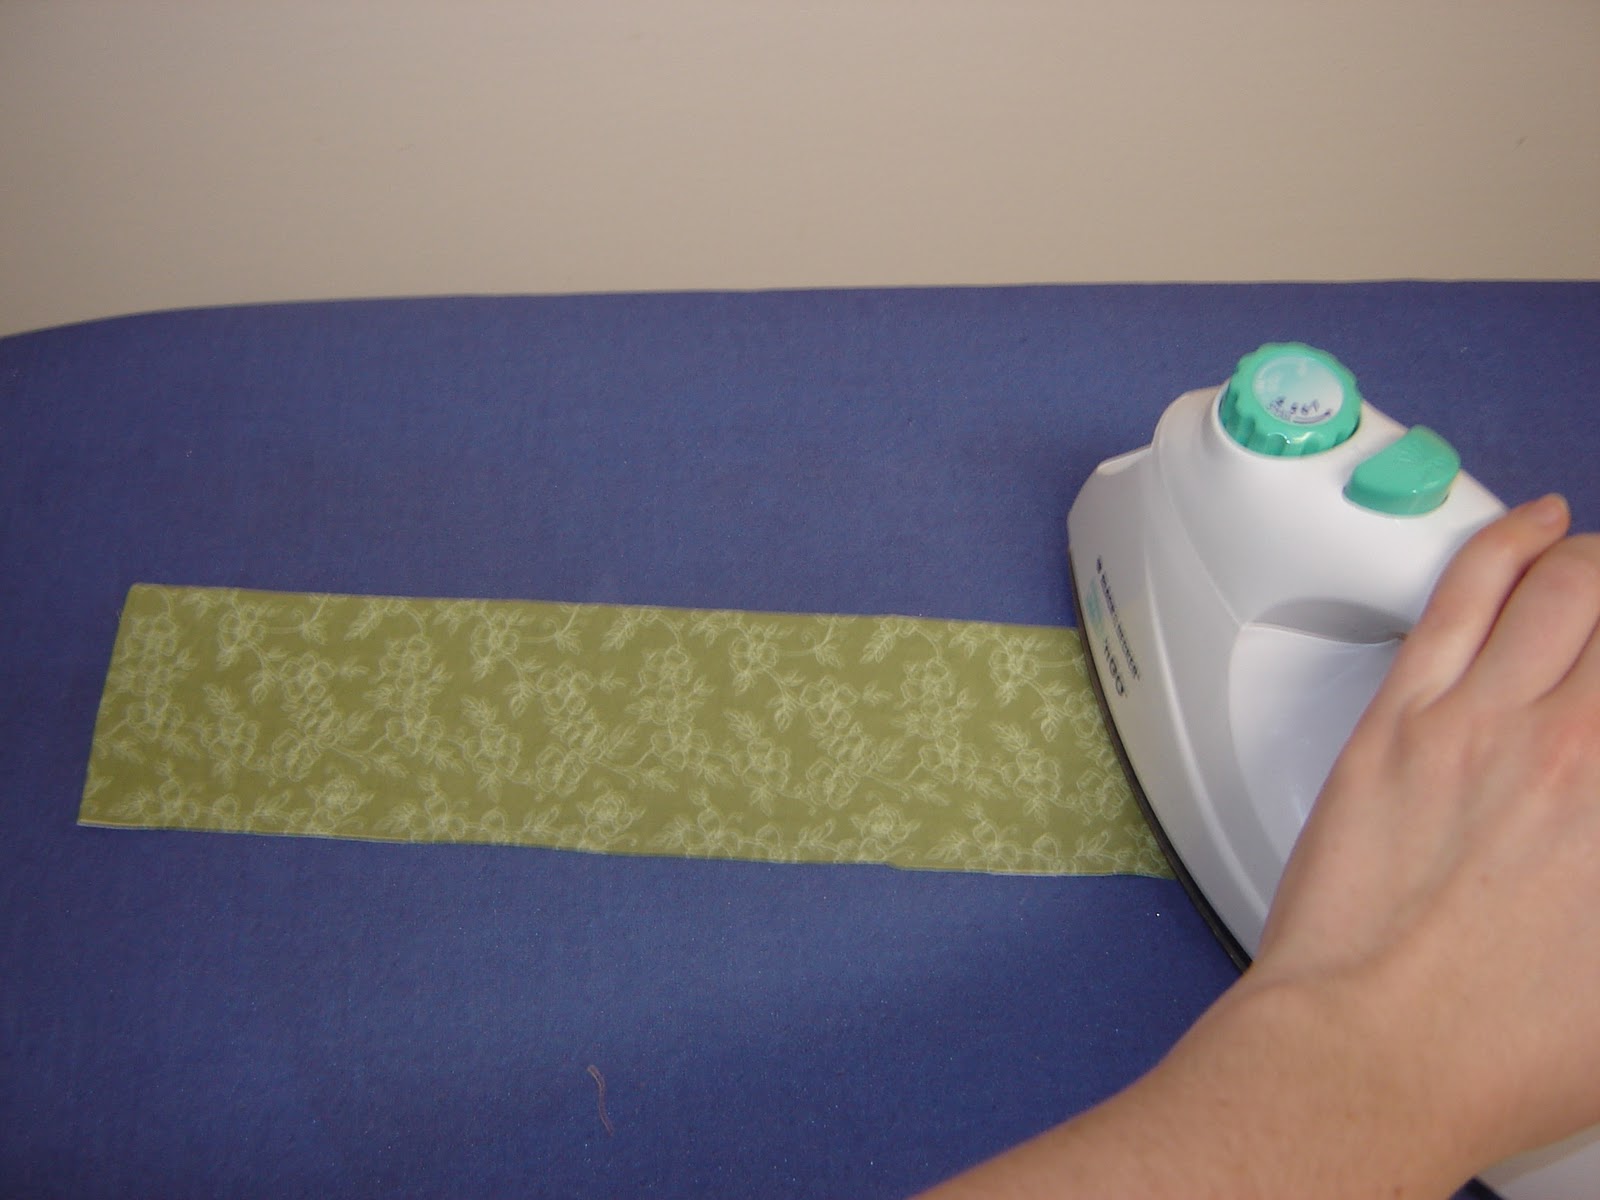
Next, get your interfacing rectangle. If you've never used this stuff before, don't be afraid. It's actually very easy to apply, and it'll make your fabric sturdier to accommodate all those crayons. Here's what I used:
Go to your ironing board and put the interfacing rectangle on top of the WRONG side of the outside fabric rectangle.
Next, place an old clean towel on top of everything and start pressing with the iron. It's VERY important to use the towel since the interfacing will stick to your iron if you don't. And make sure you don't slide the iron around while you're pressing since that will make the interfacing move or bunch up. Check the directions on your interfacing to see the correct temperature of the iron and how long you should press.
Now, grab the rectangle you're using for the pocket and fold it in half. Press it with the iron to make sure it stays that way.
Yes, I am attempting to iron left-handed. And no, I'm not left-handed. Oddly enough, it's easier for me to iron left-handed than it is to operate a camera left-handed. Go figure. Anyway, take the folded pocket and align it with the fabric with the interfacing (right side up).
Use a couple of pins to keep them together. Now you're going to sew straight lines one inch apart all the way across the pocket piece to attach it to the inside piece (and to form pockets for the crayons). You can either measure and mark each inch with a straight pin, or else just eyeball it once you start sewing. I tried it both ways and the latter was easier.
Once all your lines are sewn and you've cut all your excess threads, take your ribbon and fold it in half. Sew that folded edge to the right side of the roll, right where the pocket meets the other fabric.
Then take your outside rectangle and pin it on top of everything, right sides together.
Then sew in place all the way around, leaving a gap on one side a few inches wide so you can turn it right-side out.
And I'm not sure why I did it this way. Don't put the gap at the very edge where the corner is. That will make it more difficult later on to sew closed. Leave the gap in the center of that side instead. Just another "do as I say, not as I do" moment!
Also, clip your corners. Use scissors to make a diagonal cut across each corner, being careful not to cut through the seam. This will help the corners lay flat later on. Okay, now turn the whole thing right-side out. Just reach inside that gap you left, find the ribbon, and pull.
Use a chopstick or the eraser end of a pencil to push those corners out, and iron the whole thing flat.
Use a couple of straight pins to help close that gap you left on the side; the edges should fold down naturally where the seams would be.
Now top-stitch around the whole thing. This will close that gap and also just make the roll look nicer. And then you're done!
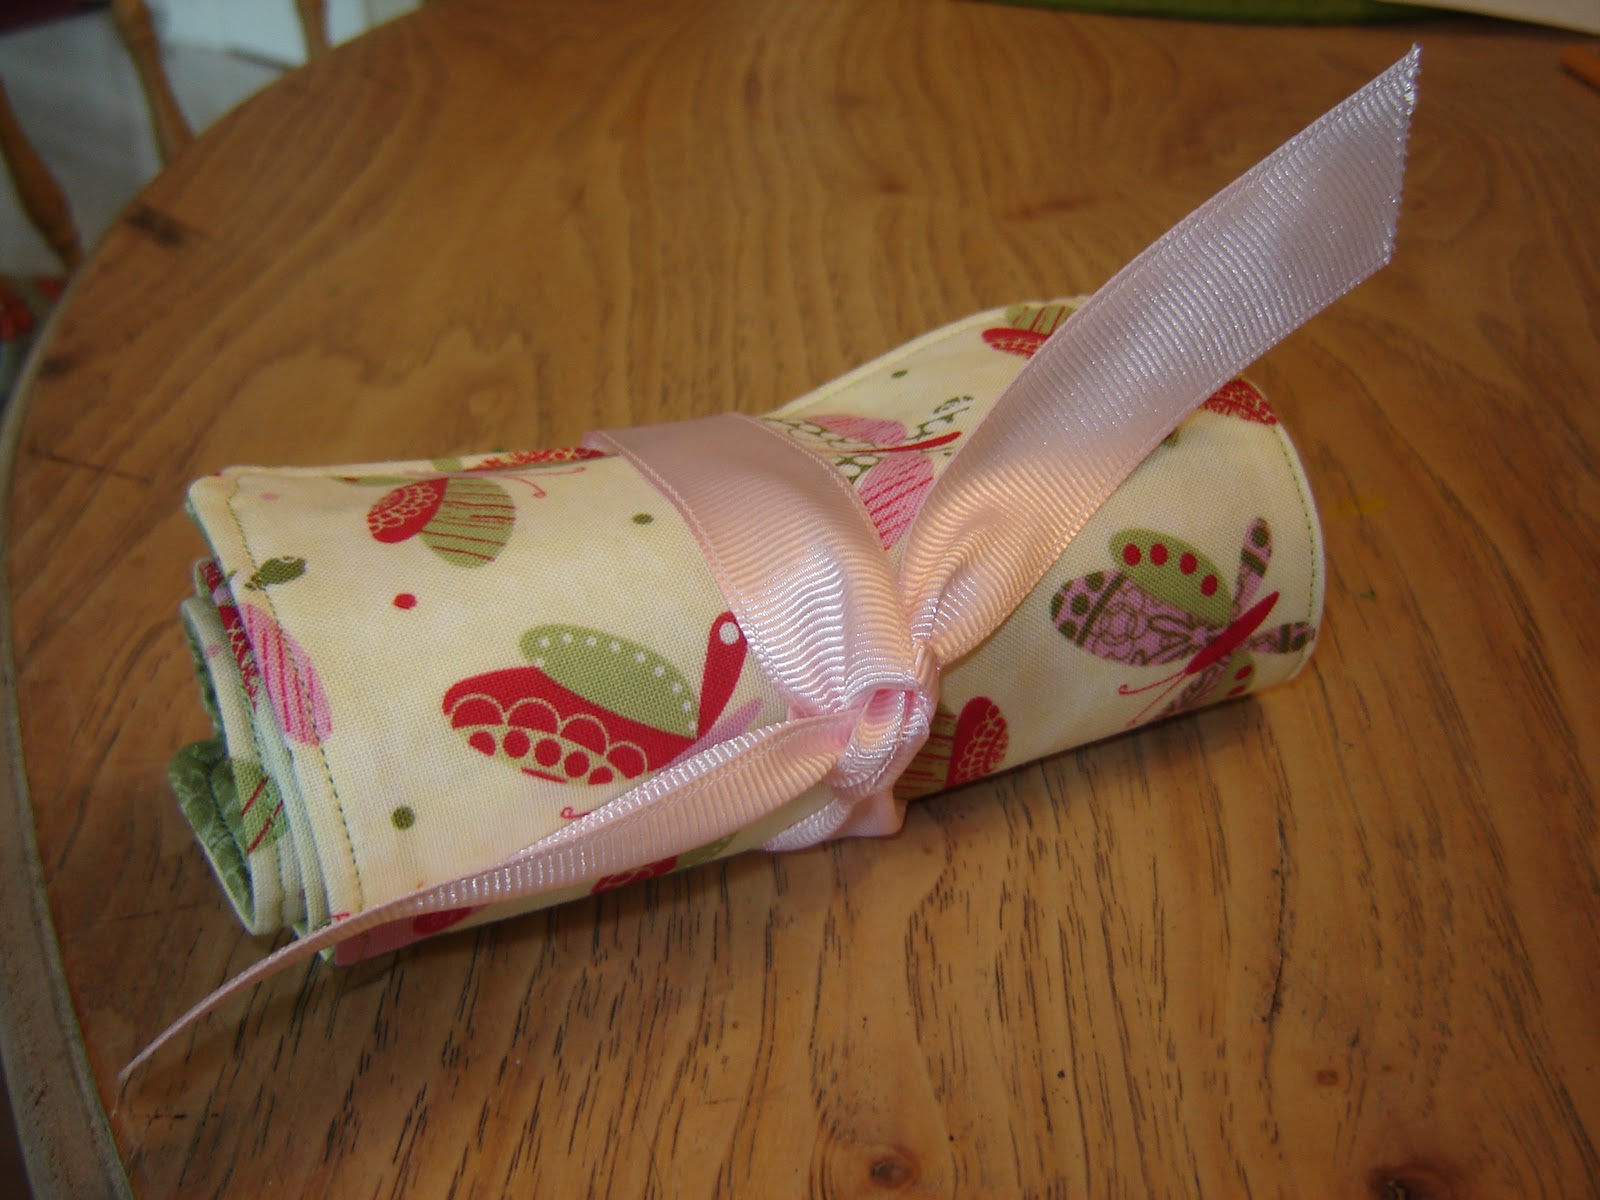
Put a crayon in each slot, roll the whole thing up, and tie it up with the ribbon. Isn't it cute?
Though this one doesn't have crayons in it. It has to make it all the way to Arizona, so I was dubious about how crayons would survive the trip. Oh well. And in case you were wondering, this is how the other one turned out:
What do you think? If these are a hit and I end up making six more over the course of this next year, I won't mind a bit. :o)
Subscribe to:
Posts (Atom)