Showing posts with label home decor. Show all posts
12.07.2017
ivey league academy: week in review!
Here's what we did the week of 11/27-12/1!
Reading: We continued with doing a Word Ladder a day as well as reading out of our Kittens and Children reader. Caleb is doing so much better with reading out loud. I can tell he's really trying hard not to rush, because it's when he goes too fast that he makes mistakes or skips words completely.
English: We finished the last part of Chapter 7, which focused on practical skills. We learned about how to use a dictionary (guide words, entry words, how to see if a word has more than one definition, etc.), library skills (fiction versus nonfiction and how they're organized on the shelf), and even how to use a phone book (a dying skill, admittedly. We covered the basics and skipped the lesson on how to take a phone message...we don't have a landline so if we ever do get one then we'll cover how to take a message!).
Spelling: We did Week 3 of his Spelling You See curriculum. I noticed this week's lessons were different in the teacher dictation part. Rather than tracing the simple three-letter words, starting this week he had to listen to the words I called out. They still have the same vowel sound in common, but it's a good way to teach Caleb to listen for the letter sounds as well as how to group similar words together.
Math: We continued in his Horizons workbook.
Word of the Week: Our word of the week was "ransack." In his journal, Caleb wrote that he would "ransack" his room if he ever couldn't find his game ball from baseball!
Bible: We continued Lesson 7 and learned about what our purpose is and why God created us (spoiler alert...He created us because He wanted to and we're to give Him glory). :)
Zoology: We played catch-up on Monday and finished Chapter 14. Caleb filled out information on the snow goose and I also copied a map out of a library book that shows geese migration patterns. We pasted it into his logbook.
After we were caught up, we continued to Chapter 15 (the second part of the Arctic habitat section). We learned about polar bears and mountain goats. For the scientific demonstration, Caleb learned about how polar bears can walk on the ice without slipping; they have special fur on the bottoms of their paws that helps them grip. To demonstrate that, we put two small cans (one wrapped up in a washcloth) on a large baking sheet and tilted it. The wrapped-up can represented a polar bear's paw, and it didn't slide down as easily as the regular can did. I also reminded Caleb that we did a very similar experiment last year when we learned about friction!
Countries: This week we learned about Ireland. We read library books and filled out a country fact sheet as usual. For our recipe, we made Irish soda bread. It uses baking soda instead of yeast to make it rise, and hearkens back to when many people in Ireland were poor and found ways to make nourishing food without a lot of ingredients. For our craft, we made shamrocks using bell peppers as stamps!
Extras: One day we had a little extra time, so we got out our SQUILT cards and I pulled up the videos for the brass family of the orchestra. We had a nice quiet listening time as the videos featured works like "Pictures at an Exhibition," "The Ride of the Valkyries," and even the theme from Superman! We still have the percussion family to go and after that I might look into purchasing another SQUILT set, maybe composers this time. Our read-aloud was Chicken Squad by Doreen Cronin. It's a very quick read as a read-aloud (as opposed to Caleb reading it by himself), and very silly and entertaining! I put the rest of the series on hold at the library because I could tell we'd go through them quickly!
Links:
Irish Soda Bread recipe (Let's Dish Recipes)
Shamrock Stamp craft (Crafty Morning)
1.08.2017
ivey league academy: week in review!
After 3 weeks off for Christmas, we jumped back into the second half of first grade!
Reading: We continued in his language arts workbook and his King on a Swing reader.
Spelling: We did Week 21 of his spelling curriculum and also added a custom word search for practice! Caleb struggled with a few of the words and seems to have trouble sounding out words so I'm currently researching other curricula to use next year.
Vocabulary: Our words for this week were "skill," "nimble," "zip," and "mighty."
Math: We continued in our Horizons Math workbook.
Bible: We began Leading Little Ones to God and so far Caleb seems very engaged and asks more questions than he did with other devotionals. I read the lesson, pausing for questions or for expanding upon an idea, then we read the suggested passage out of Caleb's study Bible and talk more.
Read-Aloud: I chose Fantastic Mr. Fox by Roald Dahl as our read-aloud because the chapters are very short and I knew Caleb would stay interested even if we read 3 or 4 chapters in each sitting. We would have finished the book on Friday but with homeschool group we didn't get to it! We'll finish it next Monday and then choose something else.
Science: We learned about ants and spiders this week. We watched Magic School Bus for each topic and then did some activities. For ants, I sketched out a simple life cycle for Caleb and then he used pom-poms and pipe cleaners to create the different life stages. We did something similar for spiders, as well as a fun, quick demonstration that answers the question, "Why don't spiders stick to their own webs?" I attached a long piece of scotch tape to a paper plate, sticky-side up, and had Caleb "walk" his fingers across. His fingers of course stuck to the tape. Then, I had him put a little olive oil on his fingertips and then "walk across" again. His fingers didn't stick to the tape that time! So we learned that spiders' legs secrete an oily substance that keeps them from sticking to their webs like their prey. Caleb was then inspired to make his own scotch-tape web, and stuck more pom-poms on it to represent bugs!
U.S. Geography: This week we learned about Missouri. Caleb colored his Missouri page and we learned about the Gateway Arch!
Homeschool Group: This week was our first time back at homeschool group since late November. We met at the center and learned about how our body works! The students colored body-system books, watched videos about how the lungs and heart work together and also why we need bones, and constructed a "hand" out of a rubber glove and drinking straws.
Links:
Free Word Search Generator (Super Teacher Worksheets)
Ant Life Cycle Inspiration (dead link, just picture)
Spider Life Cycle Inspiration (Schroeder Page)
Spider Tape Web Experiment (Science Matters)
9.25.2014
fall decor on the cheap
Fall is officially here! So I decided to dress up our fireplace mantle a bit.
I found a small bag of funny gourds at Walmart for around three bucks. I made sure they didn't have any yucky brown spots on them, and that at least a couple of them would stand up on their own. Then I grabbed some googly eyes and the hot glue gun (turns out Elmer's is useless is this case) and went to town! I also used a Sharpie to add more facial features.
Then I really got crazy and pulled out some simple chipboard triangles I had picked up at least two years ago. My vision had been a candy-corn garland all along, but for some reason I never got around to doing it. I still have some acrylic paint in fall colors that's in good shape, so I painted the triangles one color at a time, making sure to let each coat dry inbetween (it didn't take long). I didn't bother with painters tape because real candy corn looks a little muddled, so why shouldn't my garland look that way too? I used some twine we had on hand to hang it up once it dried:
Very pleased with how it turned out! :o) Welcome fall!!
9.18.2014
simple chevron table runner
This afternoon I decided to do something to dress up our table. Bear in mind that this table is used not only for eating, but also for preschool, art activities, sewing, etc. It's just become a general dumping ground for anything and everything. No kidding, I lost my phone charger for a week, and I eventually found it on the kitchen table, hidden in plain sight. I'm hoping that by putting something pretty on the table, I'll be more motivated to keep the mess a little more manageable.
So I took a cute yellow chevron remnant from Hobby Lobby, cut it to the size I wanted for a table runner, and then laid it on top of a big canvas dropcloth. (Yes, you read right. Dropcloths. As in over by the painting supplies. Cheap yet shabby chic for a number of home decor projects. You're welcome.) I basically used the canvas as both the backing and the binding of the runner, so it ended up being an inch longer than the chevron remnant on all four sides. Then I just ironed and pinned to make the "binding," and then sewed it all down.
Yes, it's wrinkled a bit. We'll just call that part of its rustic charm. Plus it's a good nesting place for this cute couple:
Saw these at Target and couldn't resist. Hopefully I won't start collecting salt and pepper shaker sets now.
3.21.2014
big boy room!
So after fixing up Micah's room a couple weeks back, I had to do something with Caleb's! His poor walls were so bare!
I had a couple of Hobby Lobby gift cards so I decided to go there and look around. All of their metal decor was 50% off! I was able to get a few things there and add them to the other items I had:
And finally, his dresser:
Hopefully that will help it from getting scratched...and dusty. :o)
There's still a lot of blank space above his dresser, but we can figure that out at some point. Whatever we put there, it'll have to be like his other stuff...cheap or free!
I had a couple of Hobby Lobby gift cards so I decided to go there and look around. All of their metal decor was 50% off! I was able to get a few things there and add them to the other items I had:
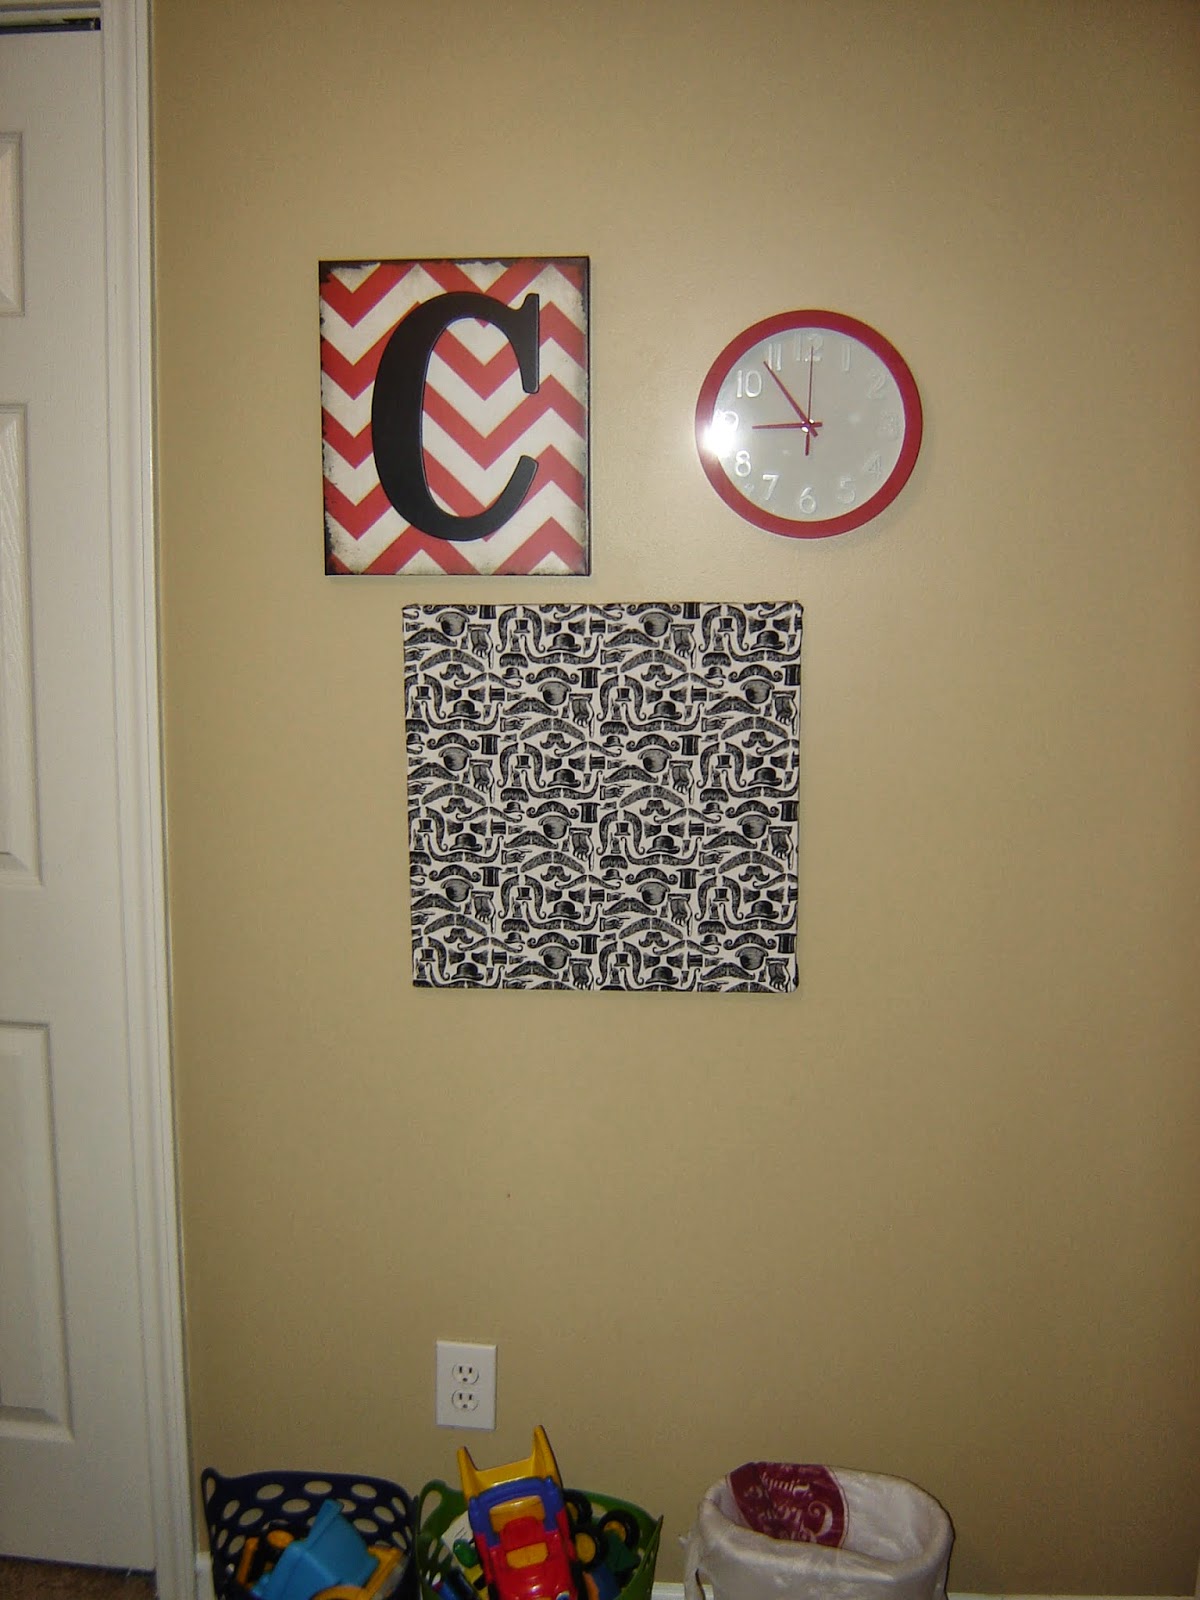
I was really excited to find the multi-colored chevron hanging...they had several of these at Hobby Lobby on clearance. All they consisted of was heavy fabric stapled onto a wooden frame; I think they had used them as a display at one time. Most of them were kind of ugly but this one just seemed to stand out and yell Caleb's name. So I snagged it for $8. The horseshoe, metal "C" hanging, and gasoline sign were also all from Hobby Lobby and 50% off. I found the mustache/top hat fabric remnant at Walmart and used it to make a dresser cover and a wall hanging (I stapled it to a cheap canvas I found at Jo-Ann). The mailbox is from Jo-Ann...Caleb loves getting mail so I figured it would be fun to leave little notes and surprises for him in there once in a while. I got the clock from Target; he can't tell time yet but it will be good to have when he can. And finally, I made the Cowboy and Engineer pictures from that Goodwill book I found a few weeks back.
I hung stuff up yesterday afternoon. I thought Caleb would come running when he heard me hammering nails into the wall, but he was distracted by a movie he was watching, so in the end it was kind of fun to see him run in there and see everything at once! He hadn't seen any of the stuff I found so it was all a big surprise!
Here's one wall....it's the one to your right when you first walk in, between his bedroom door and his closet:
Then there's the wall by his train table...you can see it straight ahead as you walk in:
And here's what's going on over his bed:
Hopefully that will help it from getting scratched...and dusty. :o)
There's still a lot of blank space above his dresser, but we can figure that out at some point. Whatever we put there, it'll have to be like his other stuff...cheap or free!
3.13.2014
Micah 6:8
Today I made one last thing for Micah's room.
It's a paraphrase of Micah 6:8; I came across it when I was pregnant and really wanted to eventually incorporate it into his room. I used a frame I already had, as well as the wrapping paper from this project. I had a lot of letter stickers left from the other hangings in the room too. In the end it just came down to getting the handprint and footprint from Micah. Which is easier said than done with a five-month-old. He wanted to make a fist and curl his toes more than helping me out on this one. :o) So we did the best we could, and then I used one of Caleb's paintbrushes to fill in the muddled spots. I actually used Caleb's paint too...it's non-toxic and washable, so I thought it was a pretty good option for something involving a baby.
I'm about 90% happy with it. Kinda wish I had used lighter-colored letters so they'd pop more against the navy blue cardstock, but since I wanted to use stuff I already had I'm okay with it for now. We could always try again further down the road when Micah's a little older (and more cooperative with art projects!), but for now this complements the rest of the stuff in his room nicely. Plus it adds another Scripture to his walls, so that's always a great thing in my book. :o)
Tags:
baby,
home decor,
kids,
paint,
paper,
picture frames
3.09.2014
there's no place like space!
So recently we took the plunge and started hanging up stuff in our house. We're currently renting, and since we didn't anticipate being in this house for more than a year, we didn't do much decorating at first. But since it was hard to feel settled without some homey touches, we decided to hang a few things here and there. So glad we did!
Micah's room has gotten the most attention so far, only because it's the smallest of the bedrooms and I already had some of the decor on hand.
I made these back in September, just a month or so before Micah was born. I had attempted to hang them with Command picture hooks, but they didn't really work. Nails work much better!
Also found an amazing set of wall decals from Target on clearance! I put a bunch of them above his crib, as well as over his changing table where some vintage space flashcards were already on display:
During a recent trip to Goodwill, I found an adorable vintage book for 77 cents:
Really, it's such a fun little book. It has an occupation for each letter, along with a poem:
I am deliriously happy with how well it turned out. And how cheaply it all came together. 77 cents for the book (with lots of usable pages leftover), $2.99 for the wrapping paper (again, lots leftover), and the frame was free. This is hanging above his dresser, and the chevron pattern of the paper ties in well with his dresser topper:
There's still a blank wall opposite the big window in his room, so I still need to figure out something to put there. It'll most likely be another Scripture, and I would love to use more of that chevron paper in it somehow!
Micah's room has gotten the most attention so far, only because it's the smallest of the bedrooms and I already had some of the decor on hand.
I made these back in September, just a month or so before Micah was born. I had attempted to hang them with Command picture hooks, but they didn't really work. Nails work much better!
Also found an amazing set of wall decals from Target on clearance! I put a bunch of them above his crib, as well as over his changing table where some vintage space flashcards were already on display:
I think they do a good job in filling blank space on the wall without doing any damage since they're removable.
During a recent trip to Goodwill, I found an adorable vintage book for 77 cents:
Really, it's such a fun little book. It has an occupation for each letter, along with a poem:
There's even a milkman in it. A MILKMAN. Do those guys even exist anymore?
What made it even more interesting is that a little girl had written on a few pages. Not to be messy, but to record her hopes and dreams:
Who is this Kelly Baldwin? When did she read this book? Where is she now? And did she ever realize her dream of being a nurse or a teacher? Makes me wonder. That's the magic of used books, I guess!
Anyway, the rest of the book was in excellent condition, so I just removed the two staples holding it together (two VERY rusty staples, might I add...glad my tetanus shot is up to date!) and then cut down the middle to get the "R" page:
I used a 12" X 12" frame I already had (hint: get LP display frames at Michael's....they have them on sale for $4.99 a LOT and they're the perfect size for scrapbook paper!), and for the backing I used some super cute wrapping paper I found at TJ Maxx:
There's still a blank wall opposite the big window in his room, so I still need to figure out something to put there. It'll most likely be another Scripture, and I would love to use more of that chevron paper in it somehow!
9.13.2013
baby on a budget: nursery wall art
This afternoon I sat down to make some wall art for Micah's room. A few weeks ago, I found some cute blue chevron scrapbook paper at Hobby Lobby, as well as some thick letter stickers. I am hopeless at freehanding this kind of thing, and the stickers seemed like a good idea. Especially since they were on sale at the time. I used some of Caleb's construction paper for the moon and stars since I didn't have any other scrapbook paper without some kind of pattern, and I figured that would be too busy with the chevron pattern being the background for the whole thing.
I kept coming back to the phrase "I love you to the moon and back" from the book Guess How Much I Love You. The story really has nothing to do with space, just a father and son rabbit trying to out-love each other! :o)
I decided to paraphrase a verse from Philippians as well. I like the idea of having Scripture on the nursery walls; I did the same with Caleb's room back when he was a baby and it really helped me know how to pray for him (especially during late-night feedings when the last thing I felt like doing was praying). :o)
All in all these two pictures took me about half an hour total. The letter stickers were really forgiving too; they were easy to reposition if needed without ripping up the paper too much. I know we have some 12x12" frames somewhere packed away. I was planning on trying to find a couple that used to hang in Caleb's old room and repurpose them for Micah's room since the Scripture hangings I made for Caleb are a little babyish for his room now. Of course since we haven't unpacked any boxes with pictures in them it's been hard trying to find them, especially since a lot of those boxes are heavy and there's no way I can move them around without hurting myself. Might have to enlist the hubby's help with that at some point. :o)
I also went ahead and utilized some cute vintage space flash cards I found on Etsy a few months back.
They were very reasonably priced and I had just decided on a space theme when I came across them so I knew I could incorporate them somehow. I used some blue baker's twine and metal clips I already had to hang them above the changing table. I went ahead and used a couple of clear push pins for this; I figured a couple of little holes in the wall wouldn't be a huge deal, plus this kind of thing is much easier to hang than an actual picture so I knew I could get it right the first time!
They seem higher above the table in the picture than in real life for some reason. I hung them at eye-level, that way the baby can't grab them when we change him. :o)
Subscribe to:
Posts (Atom)