I've mentioned before that I have eight nieces and nephews. Two of them have birthdays coming up so I decided to give this crayon roll tutorial from Prudent Baby a try. I didn't know such things existed, but they're actually a cute idea and really not that hard to put together. And with those words I will now attempt my first official tutorial....here goes!
Materials:
3 18" x 6" rectangles of coordinating cotton fabric
1 18 x 6" rectangle of lightweight interfacing
18" of matching ribbon
Matching thread
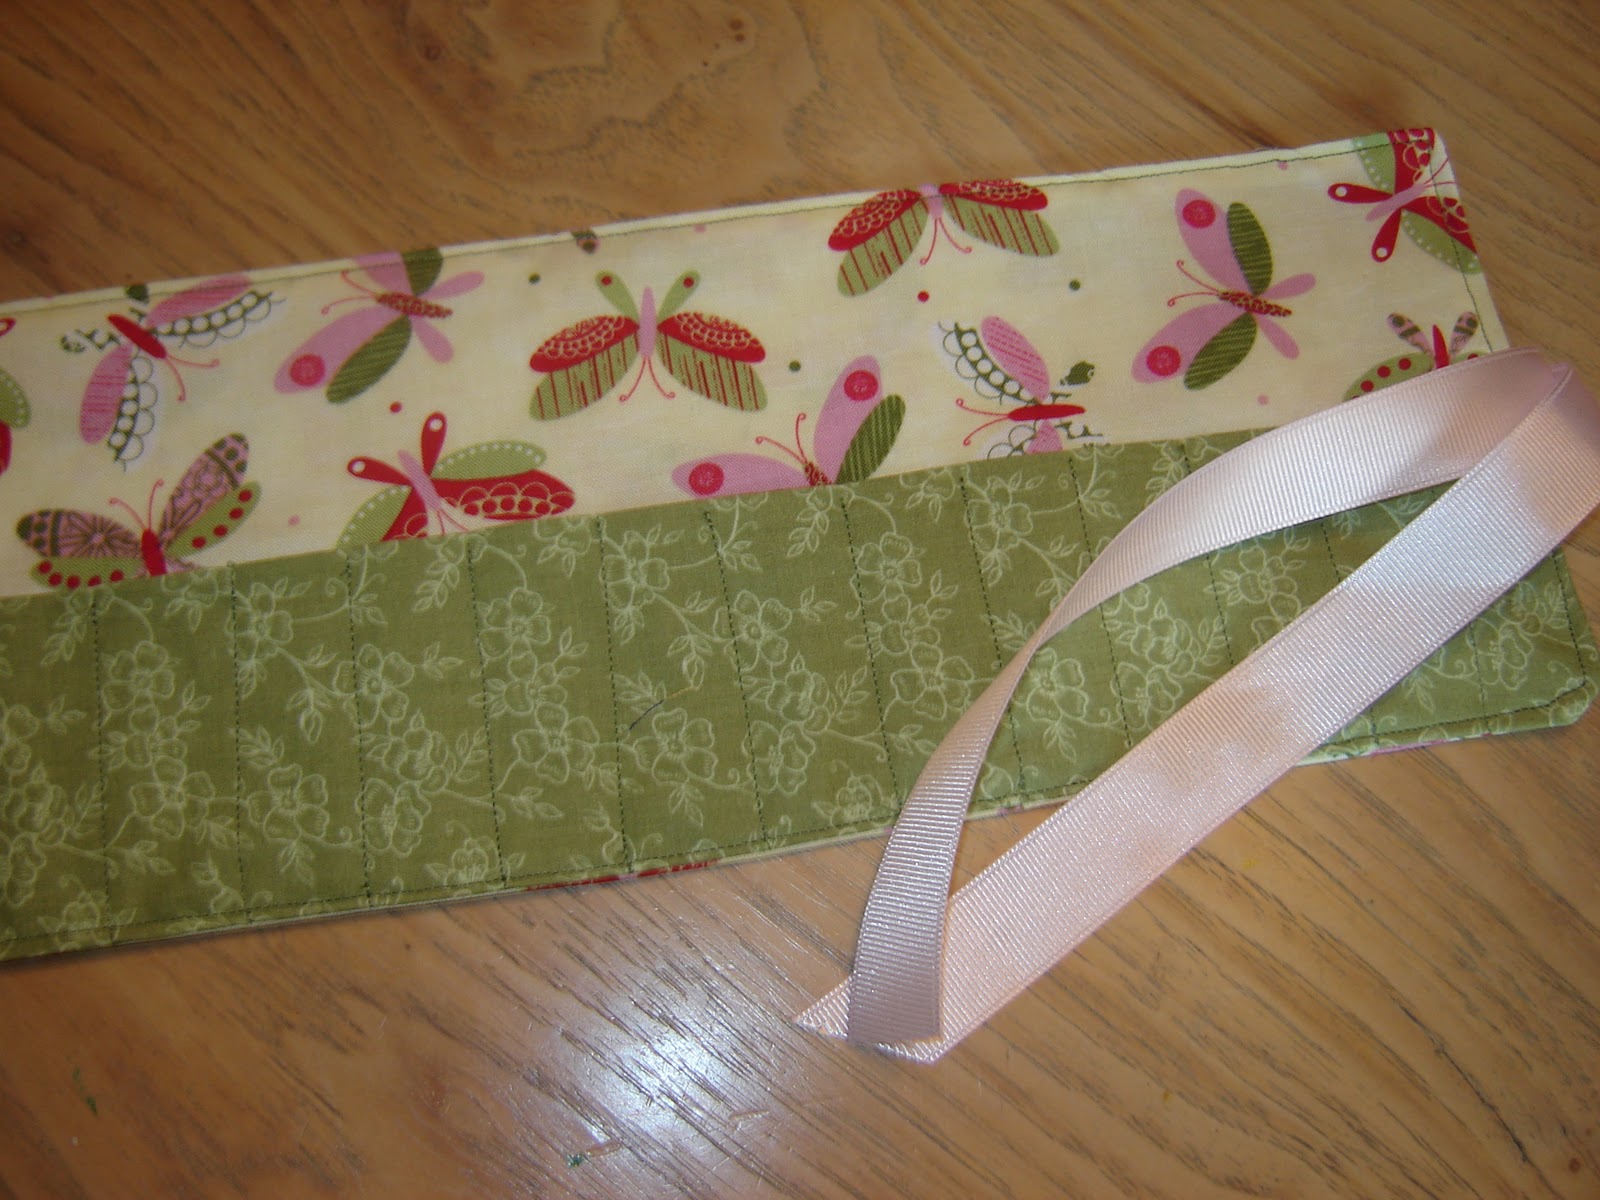
First, lay out your rectangles and decide which one you want to use for the pocket, the inside, and the outside (the outside is what you'll see when the roll is rolled up). I ended up using the same fabric for the inside and the outside for my crayon rolls (yes, I did both of these at the same time because they're that easy. "N" gets the creepy crawlers and "H" gets the butterflies).

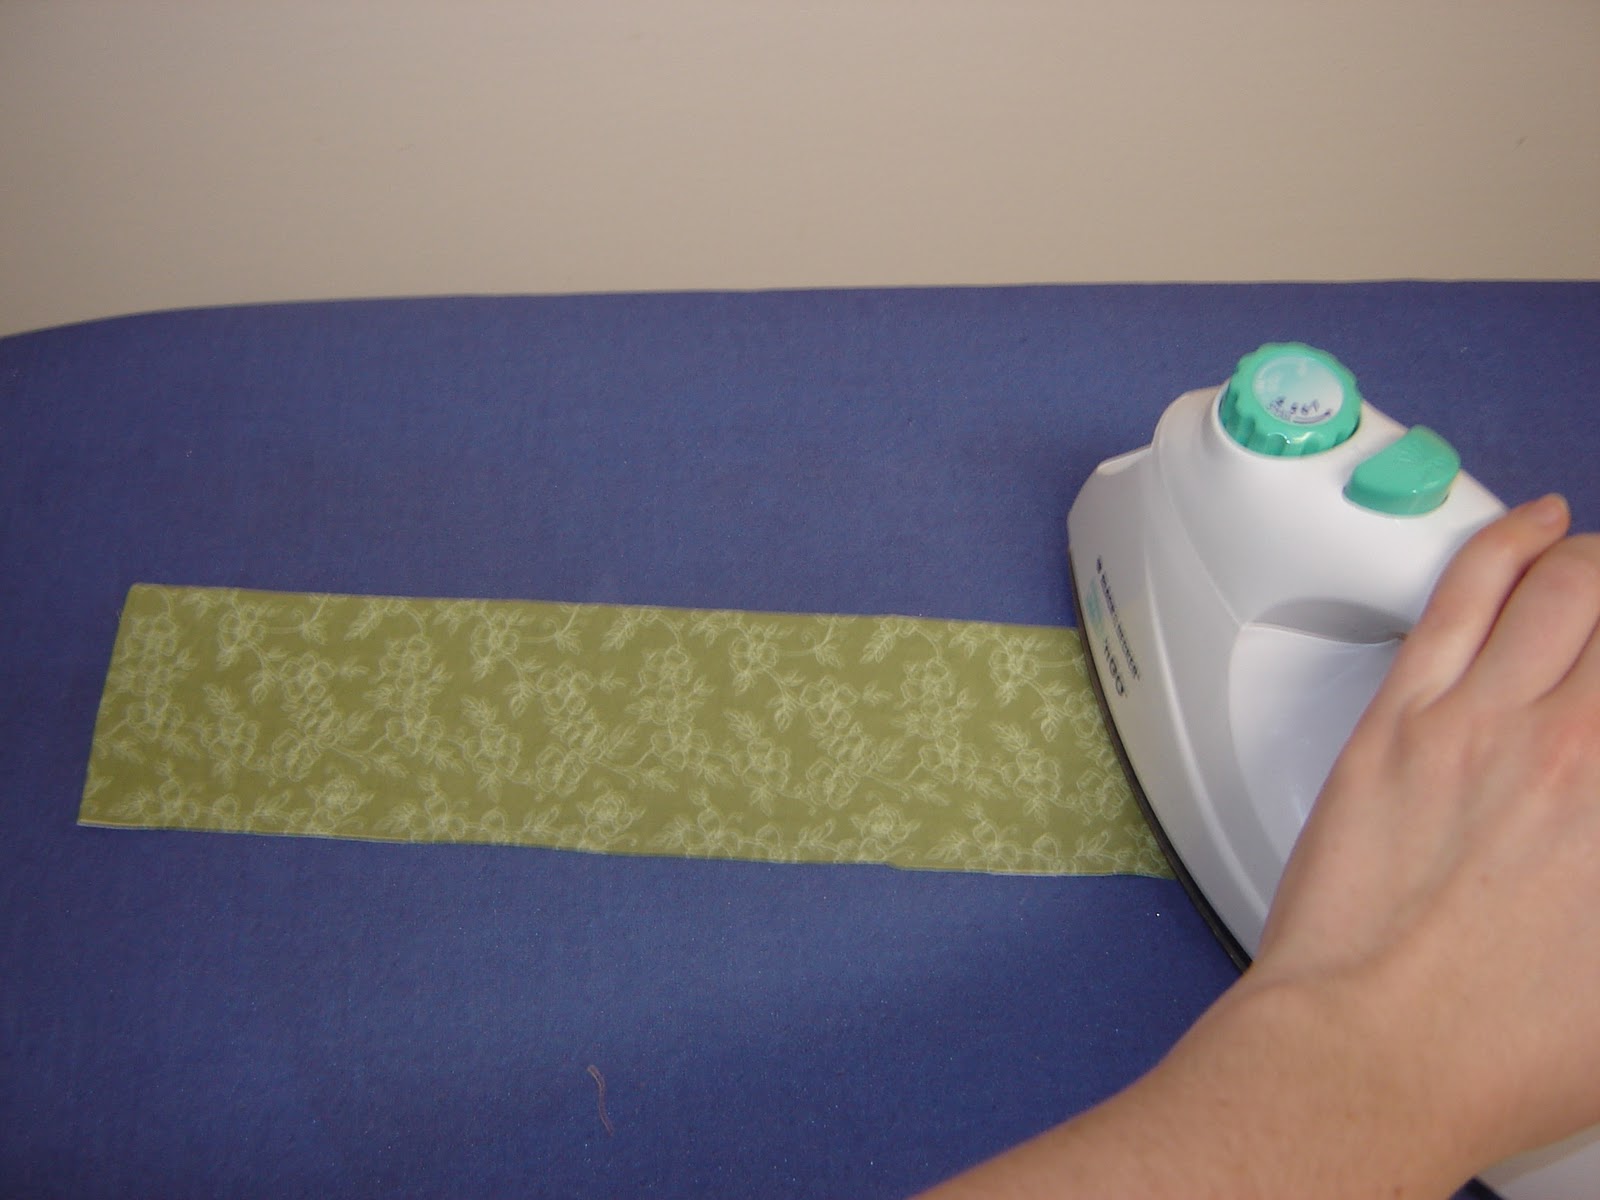
Next, get your interfacing rectangle. If you've never used this stuff before, don't be afraid. It's actually very easy to apply, and it'll make your fabric sturdier to accommodate all those crayons. Here's what I used:

Go to your ironing board and put the interfacing rectangle on top of the WRONG side of the outside fabric rectangle.

Next, place an old clean towel on top of everything and start pressing with the iron. It's VERY important to use the towel since the interfacing will stick to your iron if you don't. And make sure you don't slide the iron around while you're pressing since that will make the interfacing move or bunch up. Check the directions on your interfacing to see the correct temperature of the iron and how long you should press.

Now, grab the rectangle you're using for the pocket and fold it in half. Press it with the iron to make sure it stays that way.
Yes, I am attempting to iron left-handed. And no, I'm not left-handed. Oddly enough, it's easier for me to iron left-handed than it is to operate a camera left-handed. Go figure. Anyway, take the folded pocket and align it with the fabric with the interfacing (right side up).

Use a couple of pins to keep them together. Now you're going to sew straight lines one inch apart all the way across the pocket piece to attach it to the inside piece (and to form pockets for the crayons). You can either measure and mark each inch with a straight pin, or else just eyeball it once you start sewing. I tried it both ways and the latter was easier.

Once all your lines are sewn and you've cut all your excess threads, take your ribbon and fold it in half. Sew that folded edge to the right side of the roll, right where the pocket meets the other fabric.

Then take your outside rectangle and pin it on top of everything, right sides together.

Then sew in place all the way around, leaving a gap on one side a few inches wide so you can turn it right-side out.

And I'm not sure why I did it this way. Don't put the gap at the very edge where the corner is. That will make it more difficult later on to sew closed. Leave the gap in the center of that side instead. Just another "do as I say, not as I do" moment!
Also, clip your corners. Use scissors to make a diagonal cut across each corner, being careful not to cut through the seam. This will help the corners lay flat later on. Okay, now turn the whole thing right-side out. Just reach inside that gap you left, find the ribbon, and pull.

Use a chopstick or the eraser end of a pencil to push those corners out, and iron the whole thing flat.

Use a couple of straight pins to help close that gap you left on the side; the edges should fold down naturally where the seams would be.

Now top-stitch around the whole thing. This will close that gap and also just make the roll look nicer. And then you're done!

Put a crayon in each slot, roll the whole thing up, and tie it up with the ribbon. Isn't it cute?
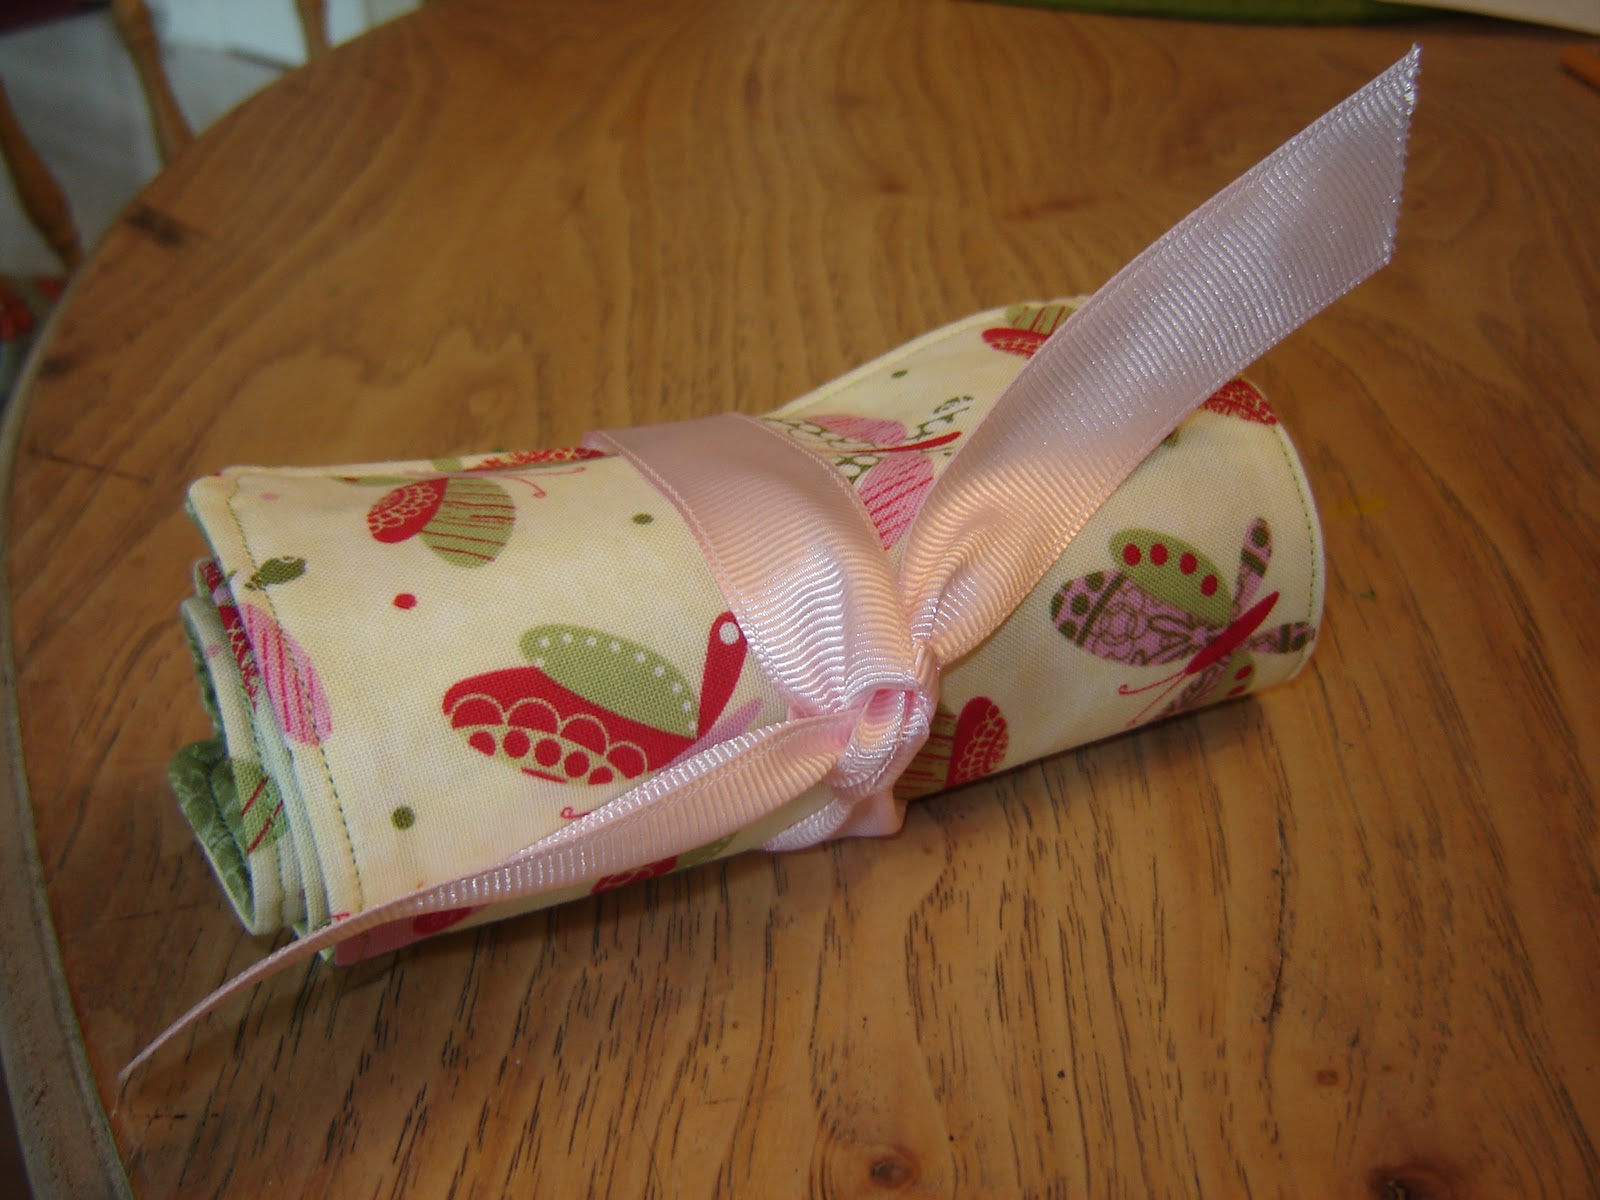
Though this one doesn't have crayons in it. It has to make it all the way to Arizona, so I was dubious about how crayons would survive the trip. Oh well. And in case you were wondering, this is how the other one turned out:

What do you think? If these are a hit and I end up making six more over the course of this next year, I won't mind a bit. :o)
No comments:
Post a Comment